 Progress
24th July 2018
It's been a while since the last update...The machine moved to the museum over a year ago now and has been running ever since ! Hardly any problems. In fact it has just celebrated it's second birthday and I went in to say hello.
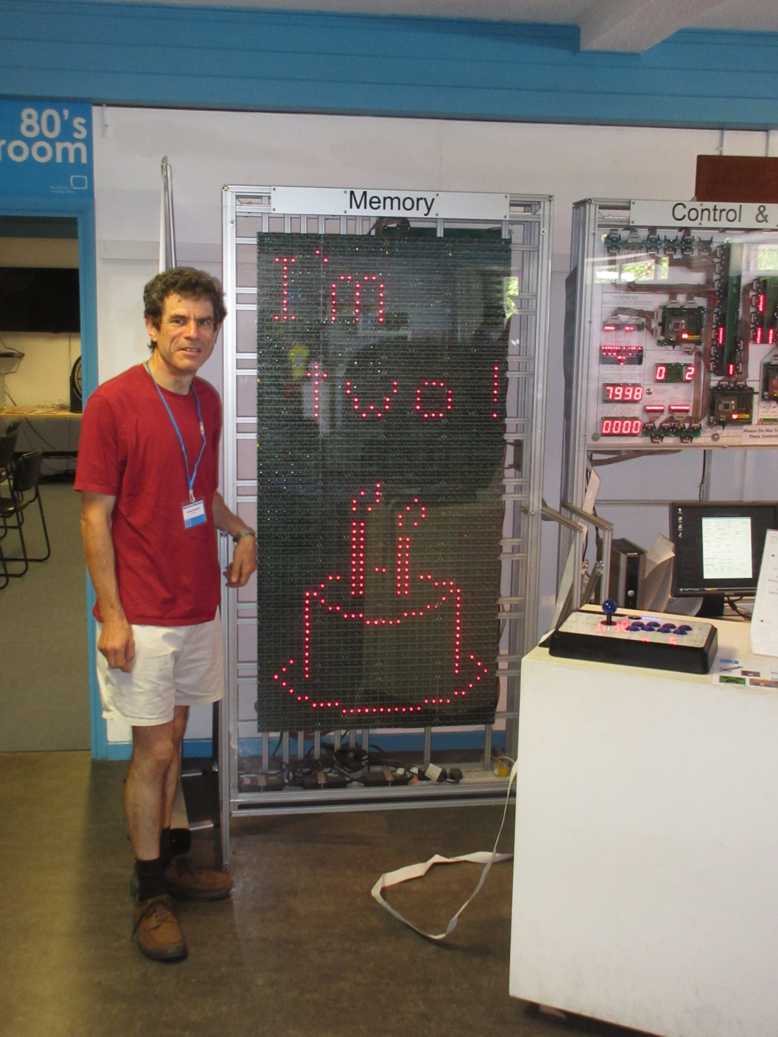
During the move there were a couple of issues, it really doesn't like being moved. In the early days it had to be shuffled around a bit as the place was being decorated and usually one or other of the inter-frame cables worked loose doing this but that was easy enough to fix. The biggest troubles were caused, ironically, when fitting protective perspex panels.
We slipped when trying to fit the panel to the memory frame and trashed one of the memory boards...
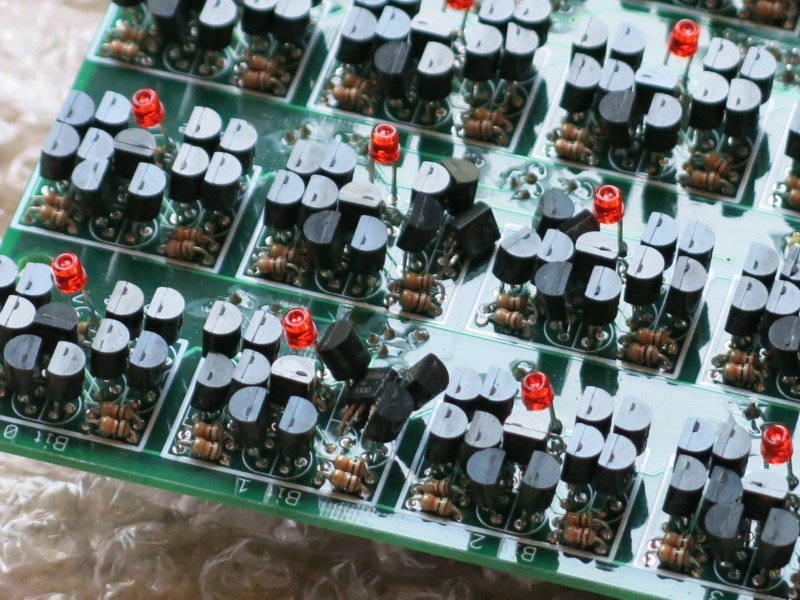
And unfortunately a transistor died somewhere in the state machine at much the same time. I've not yet managed to find it. It's causing strange voltage levels to propagate around so the logic handling iterative instructions doesn't work. So no multiplication, division, square root or shifting. Fortunately we don't need these for Tetris, so its not urgent. But I would like to fix it.
The grand opening was on 24th November 2017 and was good fun.
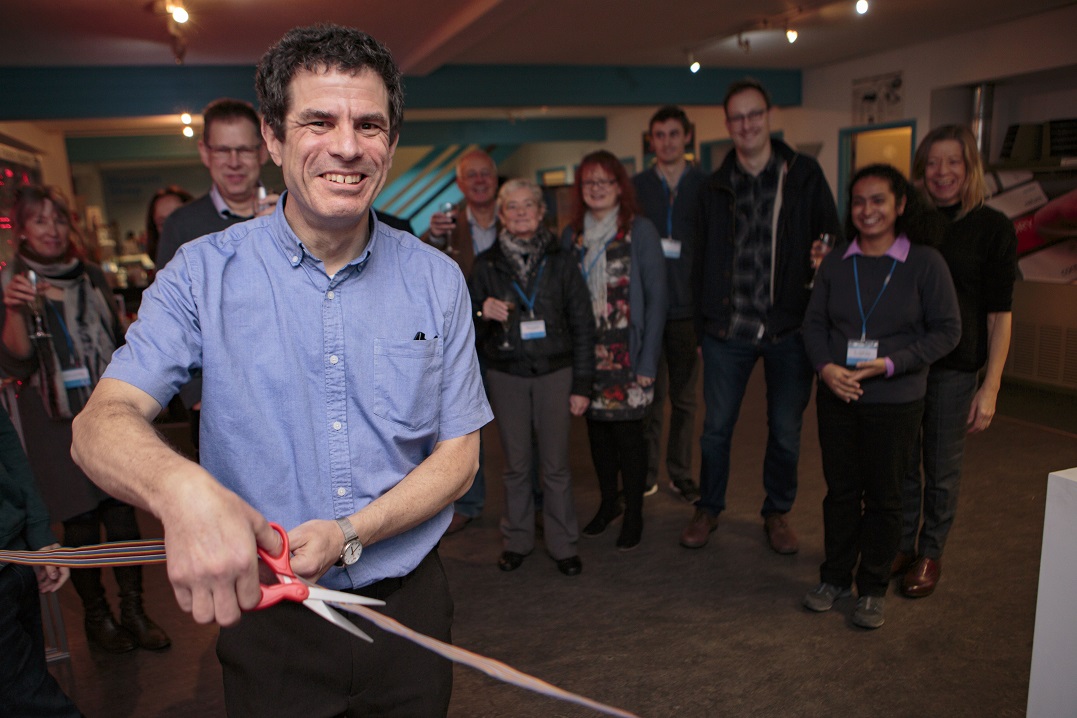
During the school holidays the museum put on one or two sessions where I go in for an hour or two to talk/demonstrate to anyone who turns up.
Another highlight was getting an "official" world record from Guinness..
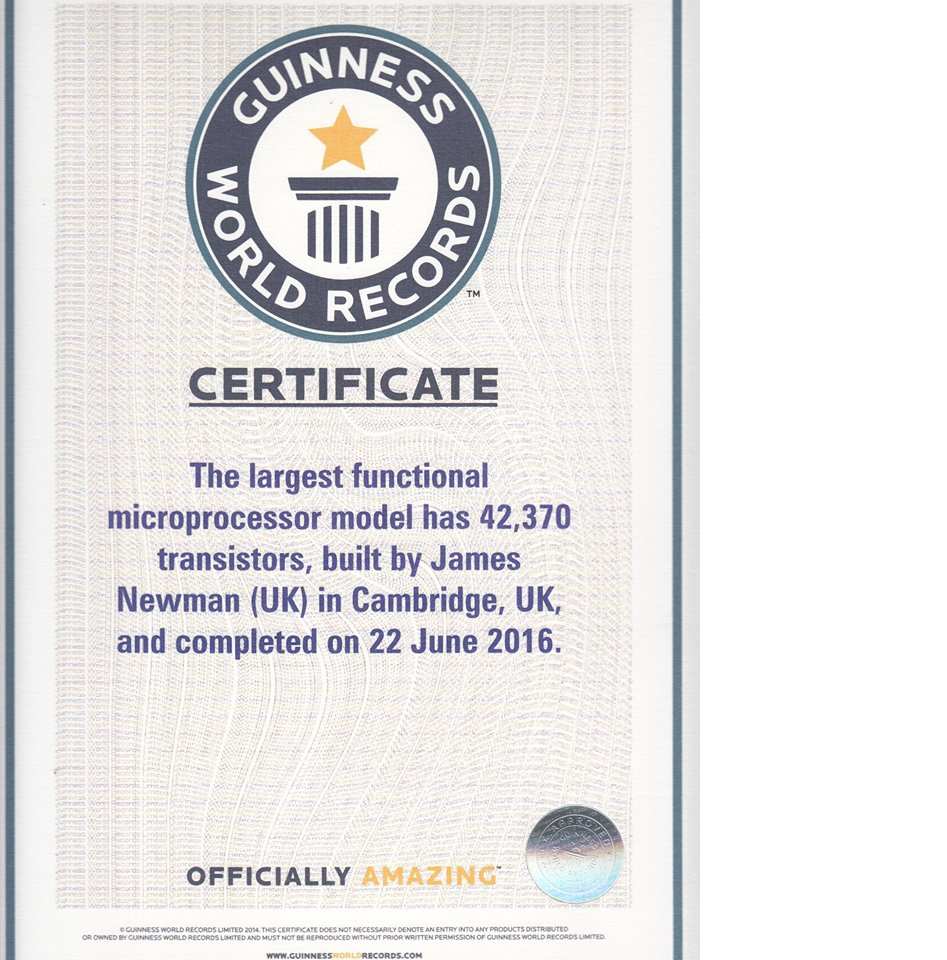
Slightly contrived category but really quite chuffed nevertheless.
And also we had another little burst of publicity when Jason, the director at the museum, was interviews for Computerphile and did a pretty good intro to the machine.
A slight irritation during the year was some miscreant continuously hacking the website to try and sell dodgy watches. After much huffing and puffing the site host finally let slip that I was on an ancient legacy system and perhaps I should move, for a fee, to one of their more modern offerings. I did move, but to somewhere else entirely and things seem a lot better now.
20th October 2016
Well last week the team from the museum turned up (L to R: me, Steve, Bryan, Chris) and we took apart and wrapped up the machine...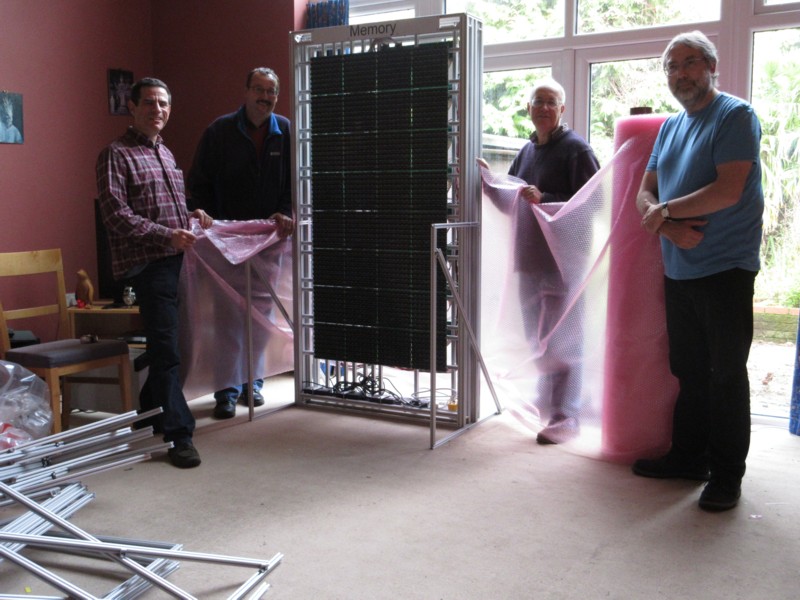
packed it into a van...
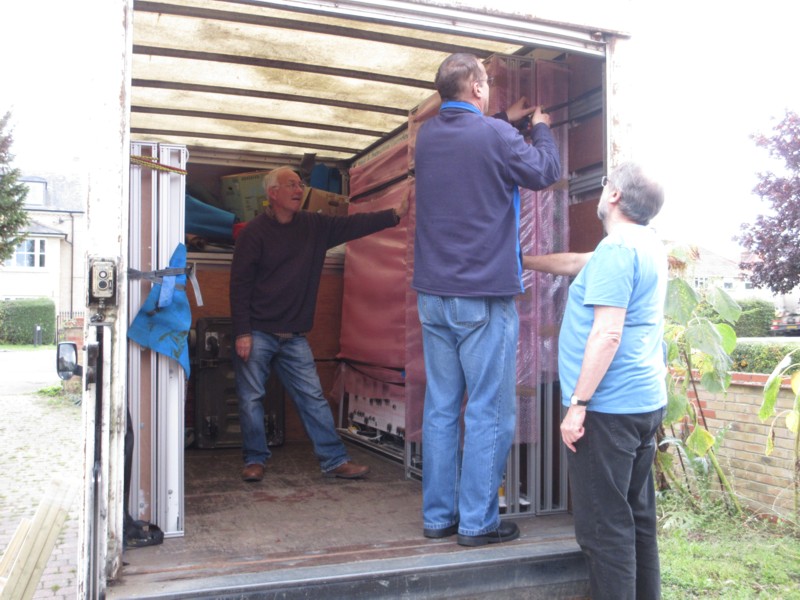
drove across Cambridge ...
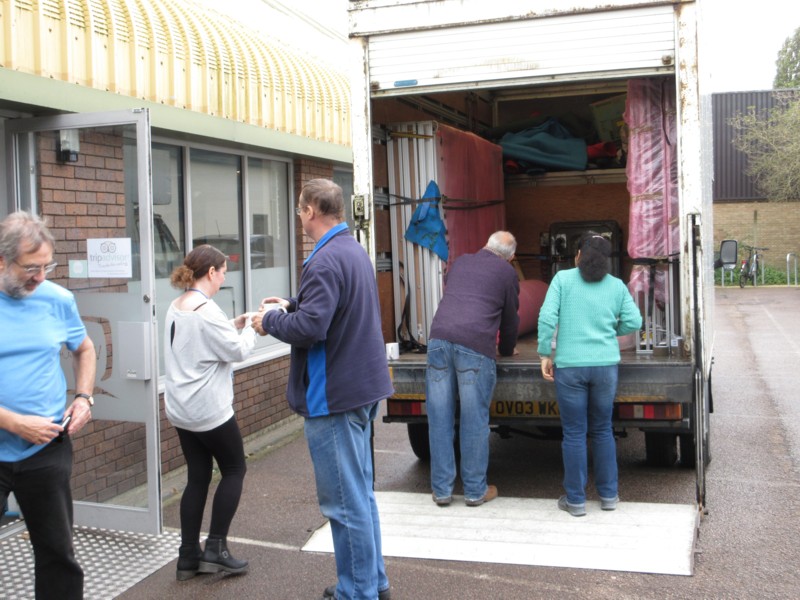
and unloaded it....
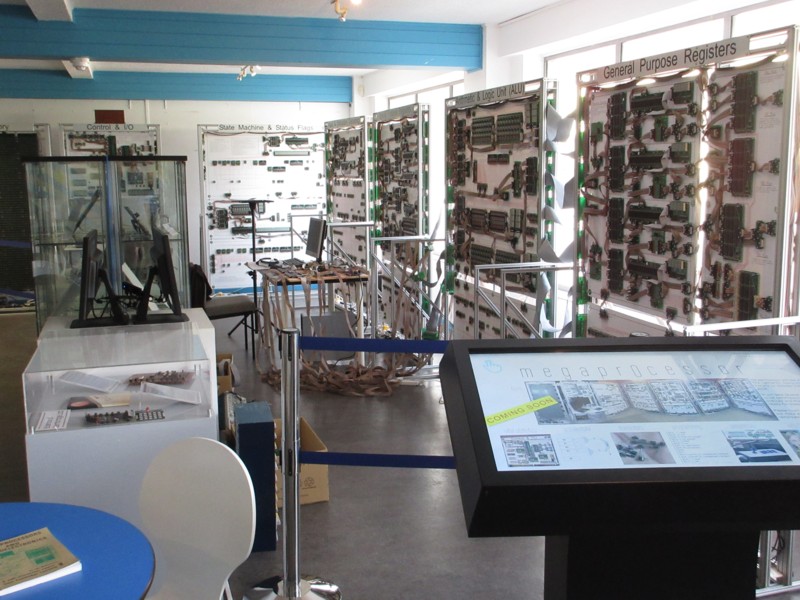
I then recreated my test system and spent the next week recommissioning it.
All in all things went very well. Only three solder joints failed. Much more surprising was that I found about ten joints I had not soldered in the first place !
It's now up and running ....
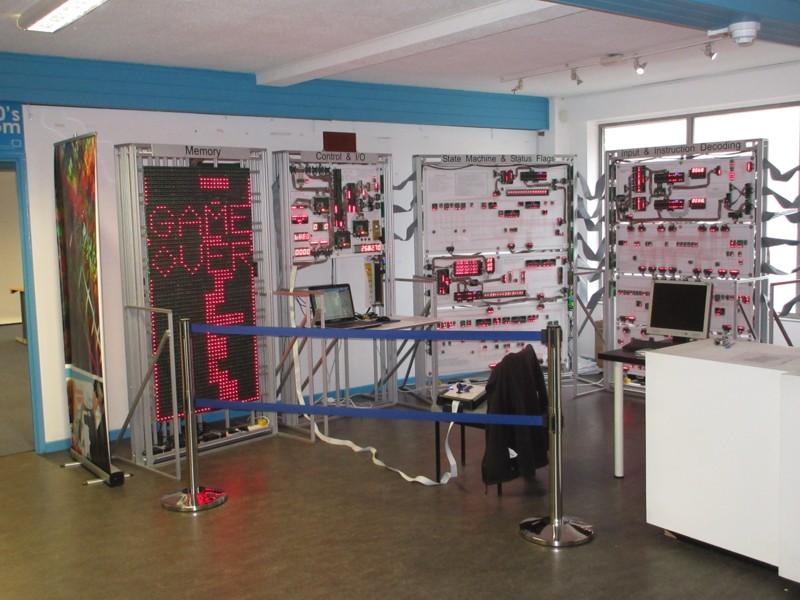
but we've not yet completed the installation. There's a bit more testing (I have my suspicions about the memory frame, there have been anomalies in the past but it decided to behave itself when under test); we need to properly fix it in place (to the wall, sort out windows, add protection etc); and then stitch it into the rest of the museum. Maybe a few weeks to go, but the hard bit looks like its done. It has also now run a whole day kind of on display without me having to nurse it along.
24th September 2016
The Megaprocessor has a new home. The Centre for Computing History based in Cambridge. The move will be in a few weeks time, middle of October. It's going to be "interesting", I suspect a few solder joints will fail and we'll find out just how good my test system is.
So I need to finish my set of spares (nearly have) and write some kind of Owners Manual. And finish testing some of its function (it has a UART I've never used). And it would be nice if it had an audio beep function. And ...
20th August 2016
Now the build has finished the pace has slackened somewhat but stuff is still happening.The next Open Day is 10th Sep. I've had several so far which I've really enjoyed. The beast has mostly behaved itself.
It's been a couple of months since the build finished so we can maybe start to make a judgement with regards to reliability. The impression I have so far is that if you don't move (or shake) it then everything will be fine. Unfortunately I have had to move the memory frame around a few times and it's developed a couple of faults. Currently these are benign in the sense that they don't break any of the programs I currently have. My inclination at the moment is to leave well alone and wait till it breaks properly and fix things then. There's also a loose connection somewhere in the control logic for the PC mux. This revealed itself when I had a large group of people here and things were being shaken a little, but disappeared before I could properly locate and fix it.
All of this means that when the Megaprocessor is moved to its final home I can expect a bunch of problems. I'm (currently) relatively sanguine about this, I think I have a good set of tools to find and fix these kind of faults. As a backup I'm also building up a small kit of spares (the soldering has begun again :-( ).
A few people have sent me (or brought in) programs they've written. I've filmed them, or at least their output on the Memory frame and uploaded them to this YouTube playlist.
Something that has caught my interest is looking at the website traffic and trying to work out what is happening and what it means. I don't know yet but my first observations are here.
25th June 2016
Several people have remarked that the videos can be slow to download so I've uploaded them all to YouTube at https://www.youtube.com/c/Megaprocessor .I've created two playlists. One is a collection of those created during test and integration. The second is the set of videos for the Stepping Stones page.
22nd June 2016
It's built ! And it works !!Here is a video of the complete machine: tour_video.
There's a few imperfections:
- a couple of display LEDs aren't quite right - I think there's either some marginal build quality or a transistor is in distress. We'll find out which when it goes pop.
- the variety of multiplexor boards with their different layouts is unhelpful
- it doesn't go as fast as it should - there's a bit more I need to understand
- ...
I've also started a new page, Stepping Stones, to try and show how one gets from a single transistor to a whole microprocessor. This could take a while to complete.
23rd May 2016
Progress is very good. The five frames that make up the body of the processor itself have been integrated together. They ran for 3 solid hours executing about 10,000,000 cycles without fault (the speed, of about 1kHz, is limited by my test system). This is a key stage. It looks like there is now a real chance of success. One real practical benefit of this is that now I don't need all round access to the frames I can mount them hard against the walls and reclaim some of my living room for living in. Here is a little video of them under test.
I can't begin to describe the sense of relief I felt when those three hours ended, unreliable operation would be a nightmare. Ten million cycles without fault. This is good.
Once everything was in place it took about two days to stitch in the fifth frame:
- There were two bugs in the test software:
- the test starts by generating an initialisation sequence to coerce the wannabe Megaprocessor into a known state before the test proper. It sorted out the PC, R0, R1, R2, R3 & SP registers. But forgot to do the PS register. Doh !
- the other bug is too horribly detailed to describe but meant that the test program (but not the hardware) got the wrong answer to division under some conditions
- There was some dodgy soldering on one of the connectors. Everything looked fine at a first, second or third glance. But the problem was easy to spot once you'd dismantled the right board. And looked under a microscope. From the right angle.
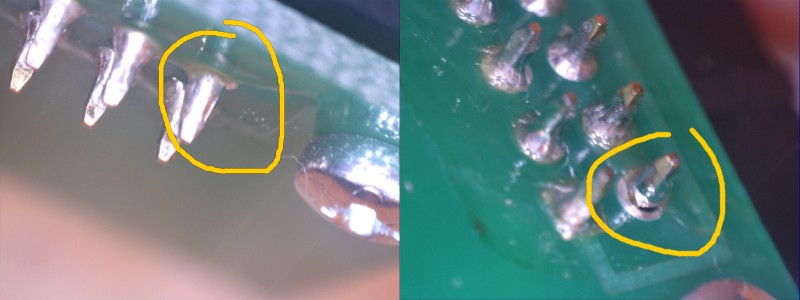
- And a new failure mode.. a mere whisker of a short.
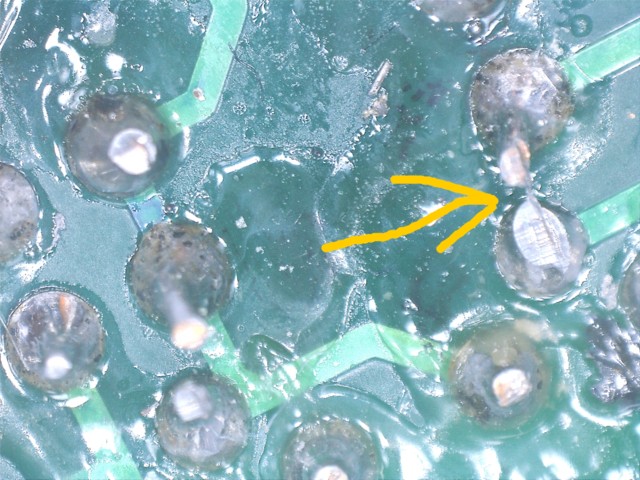
My earlier testing did not pick up on these. My guess is that they had not manifested at that time. I suspect there are a few more of these faults waiting to occur. Each time I move the frames around one or two more will reveal themselves. I'm actually quite relaxed about these. They are finite in number. And my test strategy will localise them tolerably quickly when they reveal themselves. The nightmare scenario was random transistor failure. So far, since the ban on Henry, there has been no evidence of this. The other big fears I had at the start were:
- badness with my clocks. That happened and is now (I believe) under control
- badness with my power distribution and/or grounds. I currently believe my approach has been satisfactory
The current situation is that the seven frames are now integrated as 5+2. The 5 are as good as a I can test for now. The 2 have some issues and I will now turn my attention back to them. When the 2 (these are the control and memory frames) work properly together then I can join the two "halves" together and we'll have (give or take a few more problems) a working Megaprocessor. We're really close now.
Here's a question for you.... when you think of the Megaprocessor do you think of food ? No ? Me neither. Try typing into Google "hostess wow your dinner guests". At the time of writing (this'll no doubt fade) the Megaprocessor is ♯1 ! Has been for two weeks now. I check every day and it still tickles me. It's courtesy of a rather jolly headline from The Verge. They picked up the Hackaday article and added a twist of their own.
Quite a bit of the last three weeks or so has been trying to round out the web site. The architecture page(s) is now going in what I hope is the right direction. It's at least better. And I've uploaded my current simulator and assembler to the programming page. With user guides !Those of a similar vintage to myself might be interested in this project building a 6502 from discrete components. Looks like a very fine board (could do with a few more LEDs).
[I grew up with the BBC micro and spent hours of my youth programming 6502 assembler. The memories of that time are why I wouldn't bring another 6502 into this world.]
1st May 2016
We now have the four right hand frames running together which are Input & Decoding, Special Purpose Registers, ALU, General Purpose Registers. With the current state of the living room I can't really show them in action. You can get some feel for the conditions from this picture:
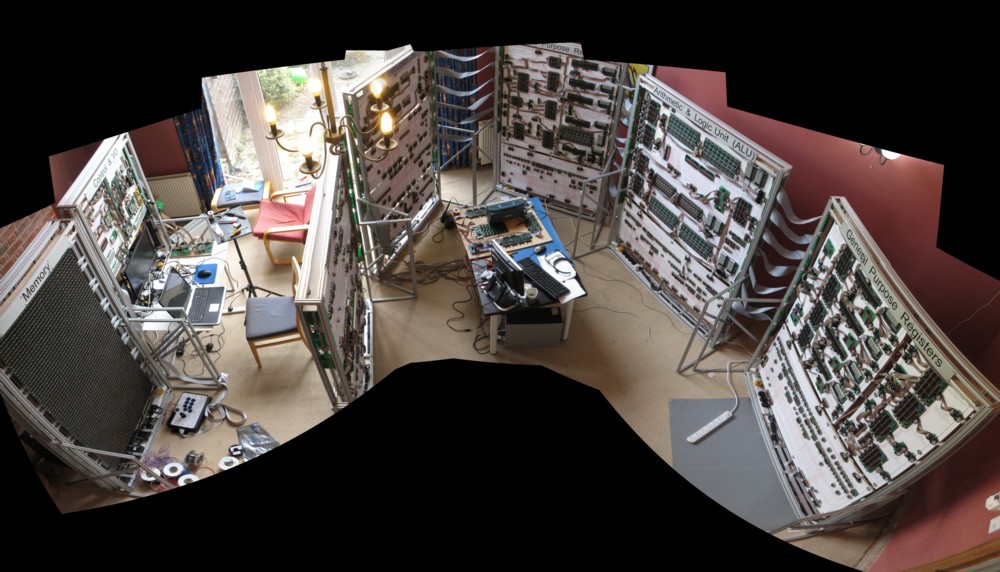
Top left you can see the armchair which is all the space that's left for me. On the left are the two front end frames being integrated together, and on the right are the five frames of the processor proper. When integration is complete I'll be able to rearrange things and liberate some space but for now it's rather cramped.
Still going fairly well but this frame was a bit harder. Had a new failure mode. Fortunately very simple to fix, but had me confused for a day or two. Some of the connectors weren't properly seated.
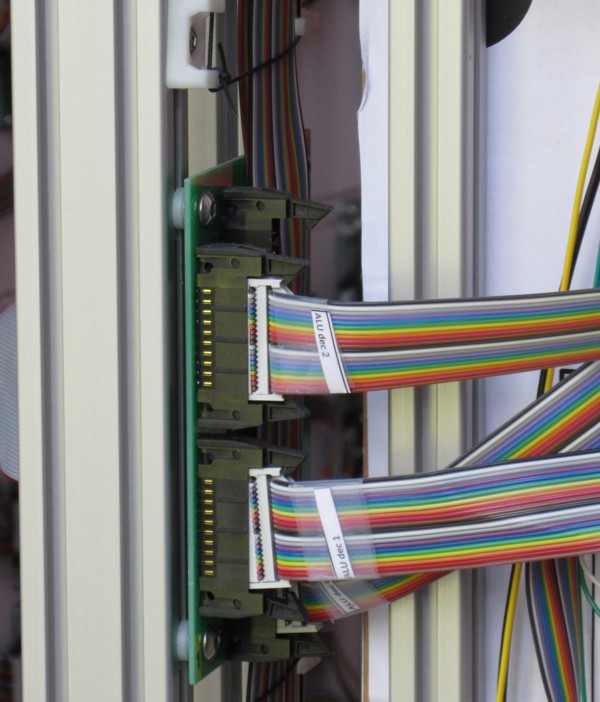
I was pacing up and down in front of the stalled machine when suddenly some lights flickered. Ah hah! dodgy connection. After seeing the above I went round all the ribbons and find 11 that weren't completely pushed home. Most of them, and all the worst, were on this fourth frame. Strange.
I also had a couple more bad solder joints. So far these have all been when soldering wires onto terminals rather than on the PCBs themselves. Even under a magnifying glass its not obvious to my eyes there's a problem. It does become clearer under a microscope.
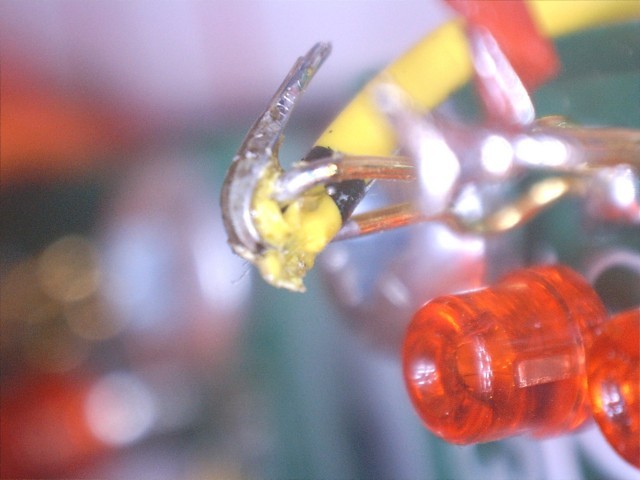
Thankfully they're not too painful to track down. When a problem occurs I rerun the test to the cycle just before it went wrong. I can then compare the signals of the hardware just before the point of error with what the software simulation says they should be and, so far, the offending signal is easily found. I've extended the growing list of build faults.
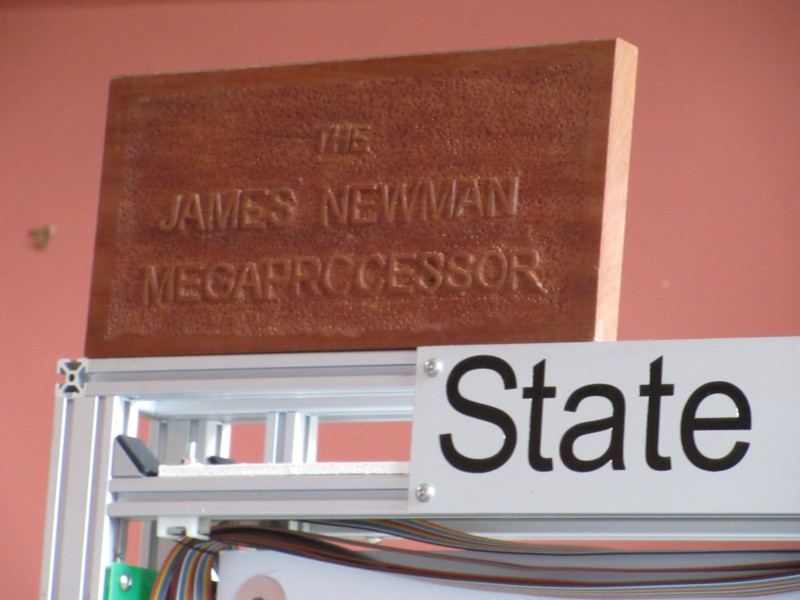
My dad has carved this for the Megaprocessor:
I've also fleshed out the architecture (still a lot to do) and peripherals pages.
And Hackaday have done an article on the Megaprocessor here.
26th April 2016
I've just reformatted the web pages so that hopefully they might render in a sensible fashion on smaller screens.
Whilst sorting out a few things I came across some of my earlier ideas of how the Megaprocessor might look (lot smaller ! and cheaper !!) and how it developed. I've started to write it up here.
I've also filled out the pages on construction and finished uploading pictures of all the boards, modules and frames. Might have to redo a few, but at least there is now a complete set to work from.
21st April 2016
I guess I'm nominally about half way through the integration plan now. Things are generally going well, certainly a lot better than I feared. But maybe this has been the easy half and trouble lies ahead. And my living room is getting pretty crowded now.
The Megaprocessor has seven frames. I've just today had the right hand three (Special Registers, ALU, General Registers) working together. A week or two back I had the two left hand frames (Control and Memory) talking to each other. Here's a couple of videos:
Hardware wise its all been pretty good so far. A couple of transposed cables. Just one, that's right, just one, failed bad solder joint. I have to say that once you know roughly where the problem is the LEDs can make it fairly obvious.
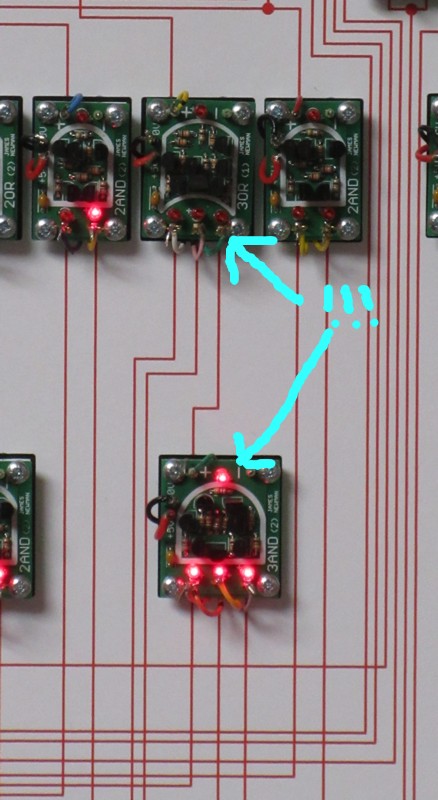
No transistor mortality as yet, about which I'm enormously relieved.
There has been a couple of significant problems.
There was a bug in my interrupt handling which my modelling showed but my tests didn't pick up. When an interrupt occurs the procesor is supposed to store the address of the next instruction so that it can pick up where it left off once its processed the interrupt. Unfortunately I forgot that beause it would have tried to prefetch the next instruction the PC was pointing to the next but one instruction. I thought the fix was fairly straightforward ... but as I write this I'm thinking I may not have solved it after all. A few more tests are called for.
The other main issue has been my clock. I shall write up all the gory details later but essentially my slow (GBU_Speed) driver circuits meant that my clock got salami sliced to nothing as it fought its way from one frame to the next. To be fair to myself I had anticipated this a while back and had planned to swap the resistor values for the clock drivers to speed them up. Its just that I forgot to do so so I had a bit of an initial disappointment when things didn't work to begin with.
18th March 2016
Just completed step 1 of the integration plan! This was essentially a first go at getting all the parts of the Control & I/O frame to work together.
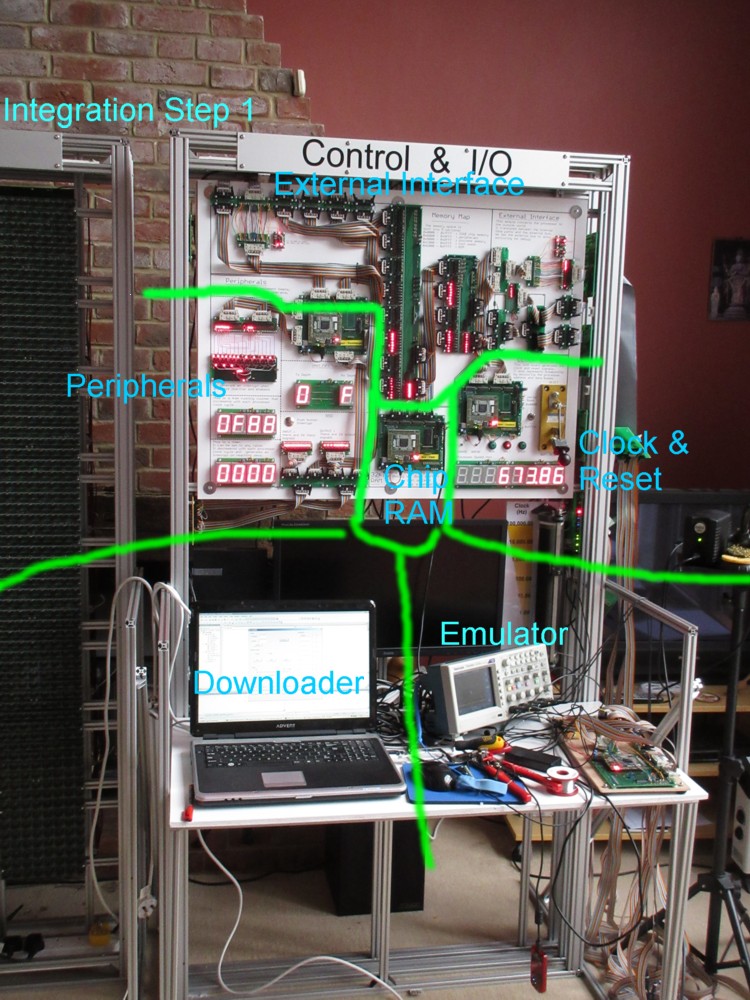
The test was to download a program into the chip RAM and then have the processor (the FPGA based emulator) boot and run it to output a counting pattern on the output port. This doesn't test much of the true Megaprocessor itself (only the external interface) but it's a big step forward. A lot of things have to be right to get this lot to run together. A key part of this is that it is the first time a version of the Megaprocessor has run on hardware in the physical world rather than software simulation. True it's on an FPGA rather than on all those beautiful transistors but it is progress.
It was fairly hard work. At step 1 everything is buggy and nothing can be trusted so there was some horrible interactions between bugs so once the easy ones were fixed I had a couple of days of bewilderment at the end until I was able to untangle what was going on. So far it's just small errors (missing connection, disagreements over signal polarity, another bad ribbon cable) nothing architectural as yet.
The next few steps on the plan (there's about 15 or so to go) are just working through all the different peripherals (timers, interrupts, UART and the Venom joystick). The next big landmark will be connecting the Control & I/O frame to the Memory frame.
13th March 2016
I've added a couple of new pages. Various people ask how much the project has cost and how much "stuff" I've used. The new page Cost & Materials has some answers. The terrifying fact I learned when writing it is that the Megaprocessor has well over a quarter of a million solder joint. Only needs one to break... But one good bit of news is that I've been underestimating the number of LEDs. It seems the total is just over 10,000. Double what I thought before.
I've also added a few more entries to the Good, Bad & Ugly series.
However most of the last few weeks have been sorting out the tools I need for the final integration. Firstly is a much larger I/O expander. This'll let me connect up to 48 of my 16 bit buses which will let my test program drive whole frames (and sets of frames).
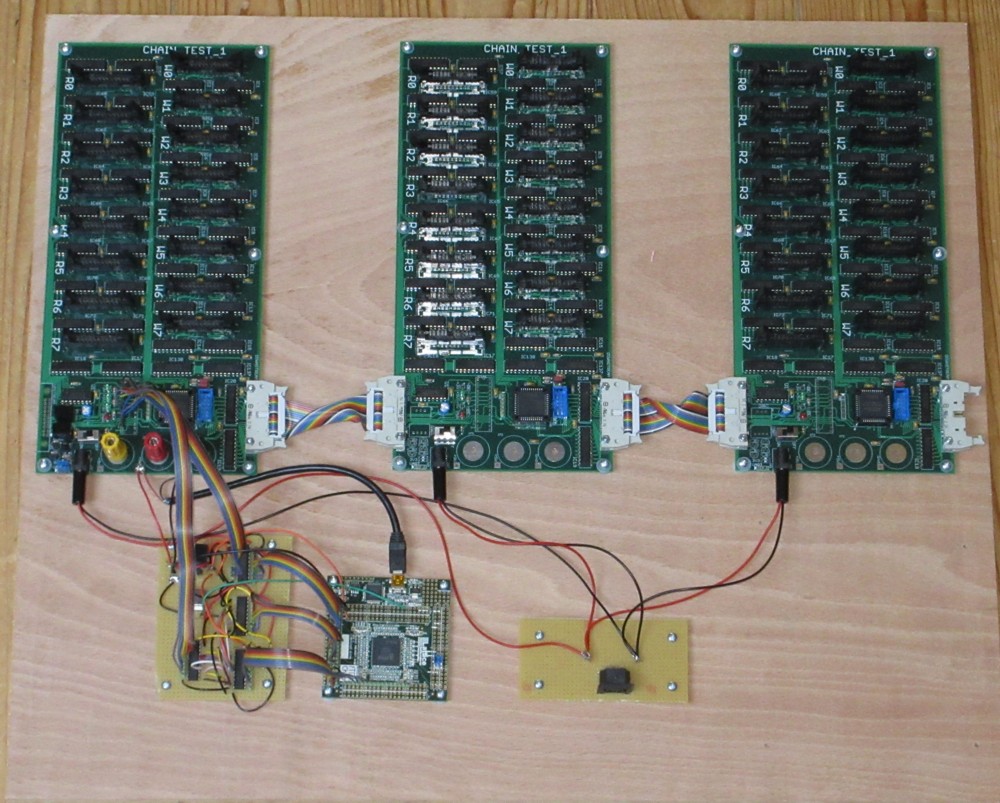
And the other key tool is a hardware simulator of the Megaprocessor for which I used a little FPGA board.
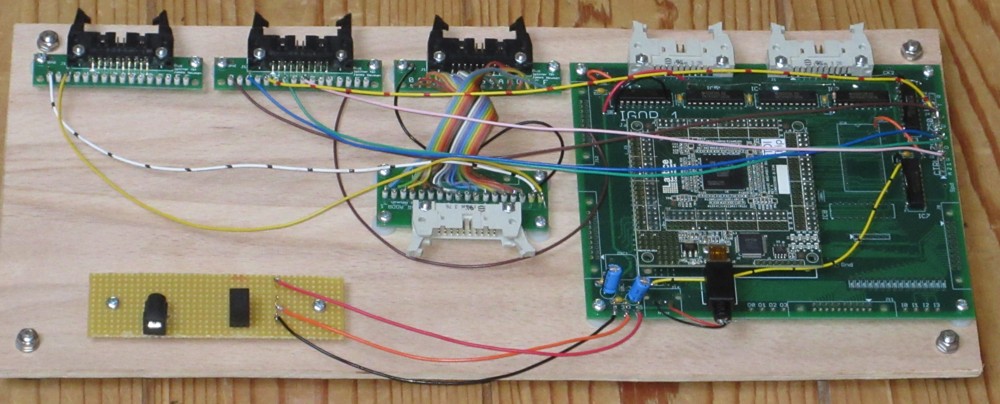
The whole Megaprocessor fits in a small corner of the square chip. The chips I've added round it are for the 3V / 5V level translations.
Which means I think I now have all the tools I need. So integration starts tomorrow !
I've treated myself to a sneak preview of what the Megaprocessor might look like when fully deployed. Wildly distorted by the panorama stitcher, I'll try and do better next time.

19th February 2016
I've been sorting out some of my software and tools ready for the final push. As part of this I now have my launch programs ready to go; Tetris, noughts and crosses (tic-tac-toe) and Life. Doing these programs drove me to finally sort out what I would actually use for user I/O. I dithered about building various things but in the end I modded a Venom Arcade Stick so we have a joystick and a few buttons.
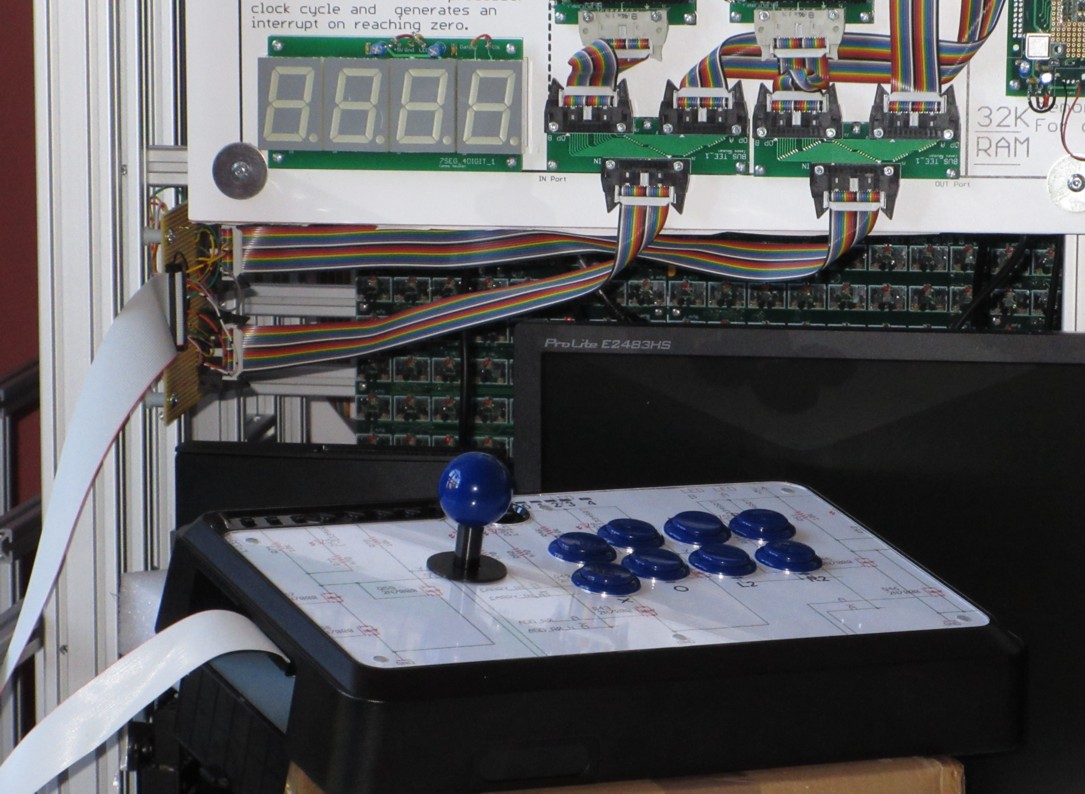
Normally it has a USB interface and expects to be connected to a Playstation. It was a very civilized thing to mod.
To develop/test the programs I extended my simulation to include a model of the peripherals, here are some screen shots.
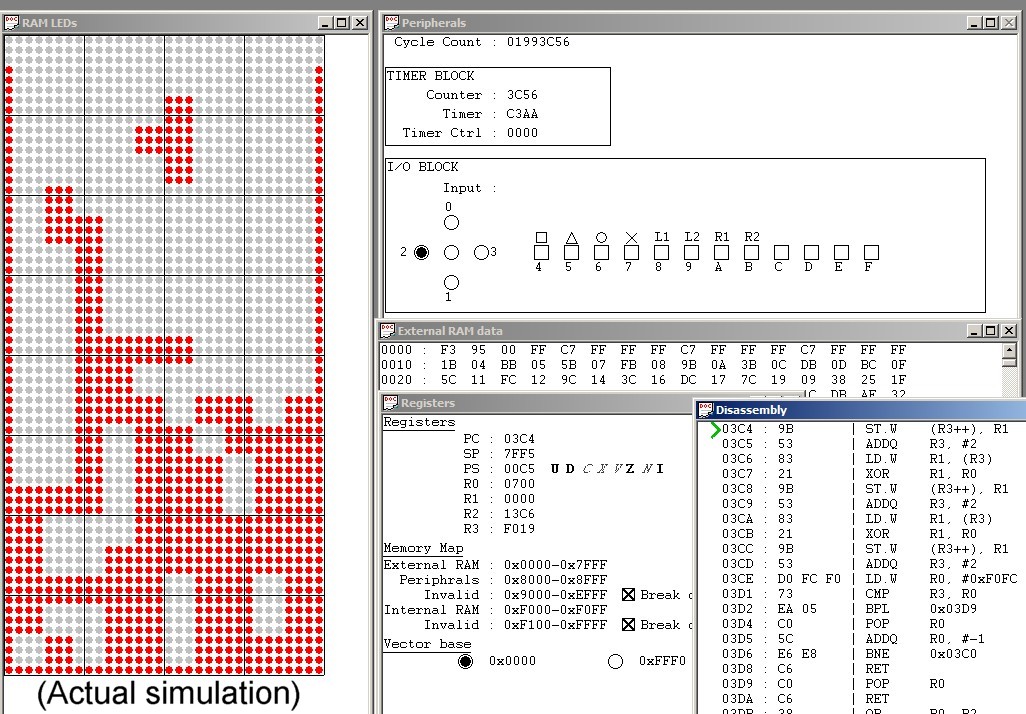
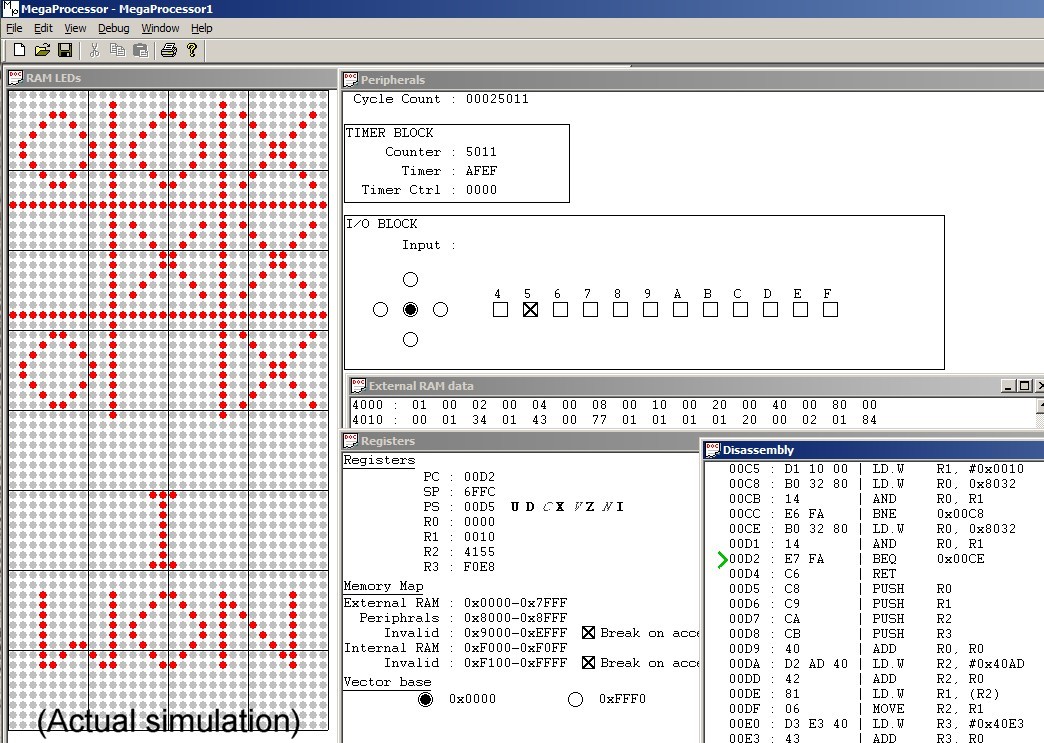
Now that the simulator is up to scratch the next step is to upgrade the hardware test tools which will take the next couple of weeks. Then, finally, integration
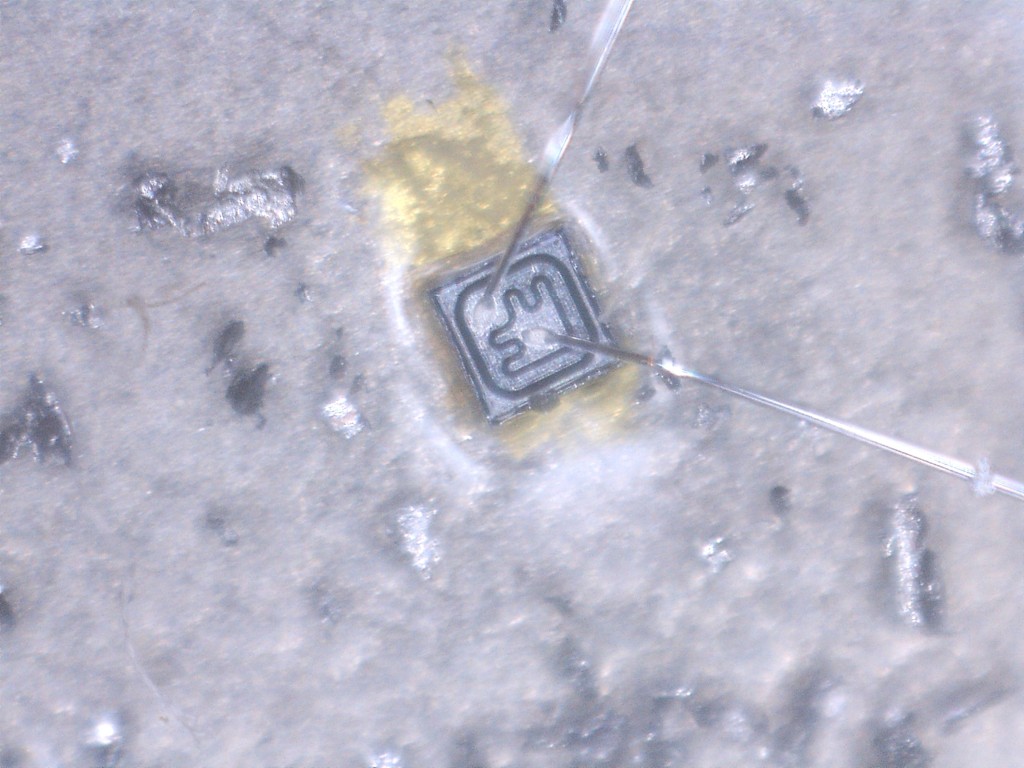
After having used so many transistors I thought it would be nice to see one in the flesh. So I got hold of a few larger ones and sawed the top off to have a look inside.
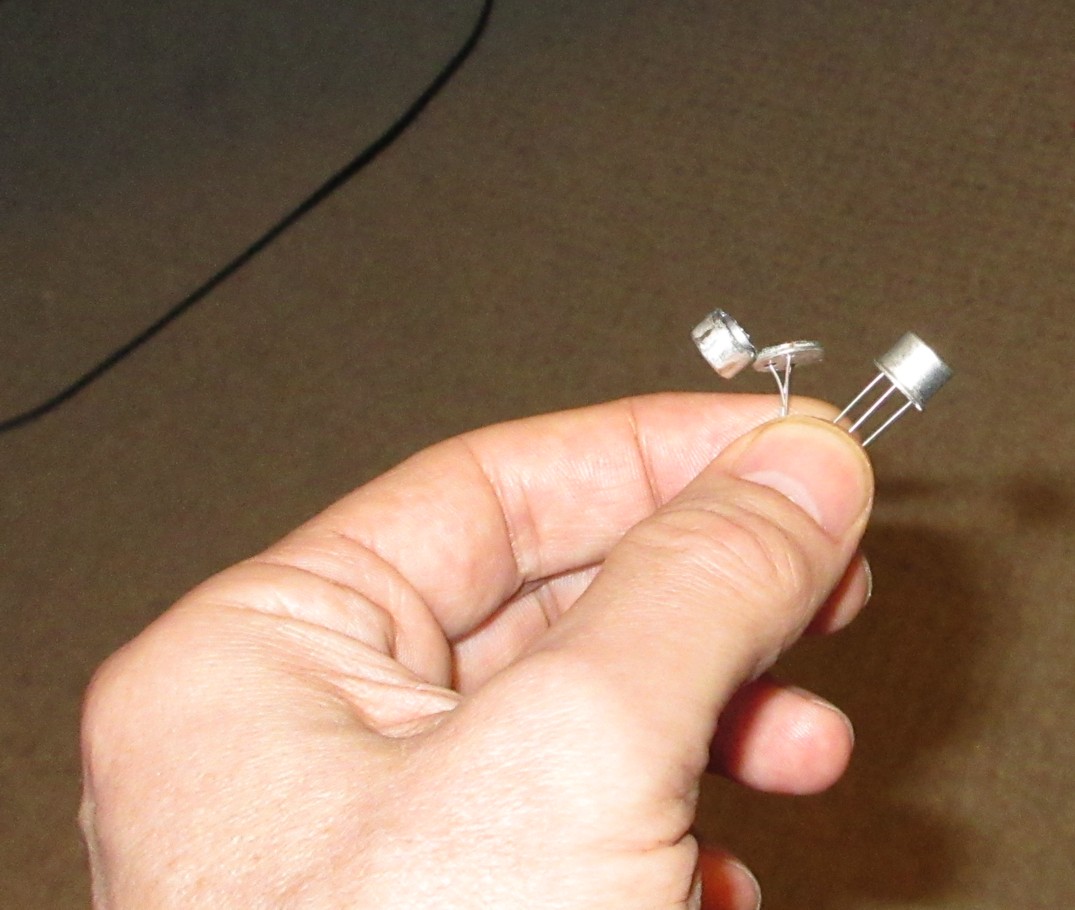
The first time round I thought I'd destroyed it because I couldn't find anything. So I chopped up another one being careful to remove as little as possible. Still nothing. Well actually it was there, just tiny tiny tiny. Treated myself to a new microscope to have a look inside.
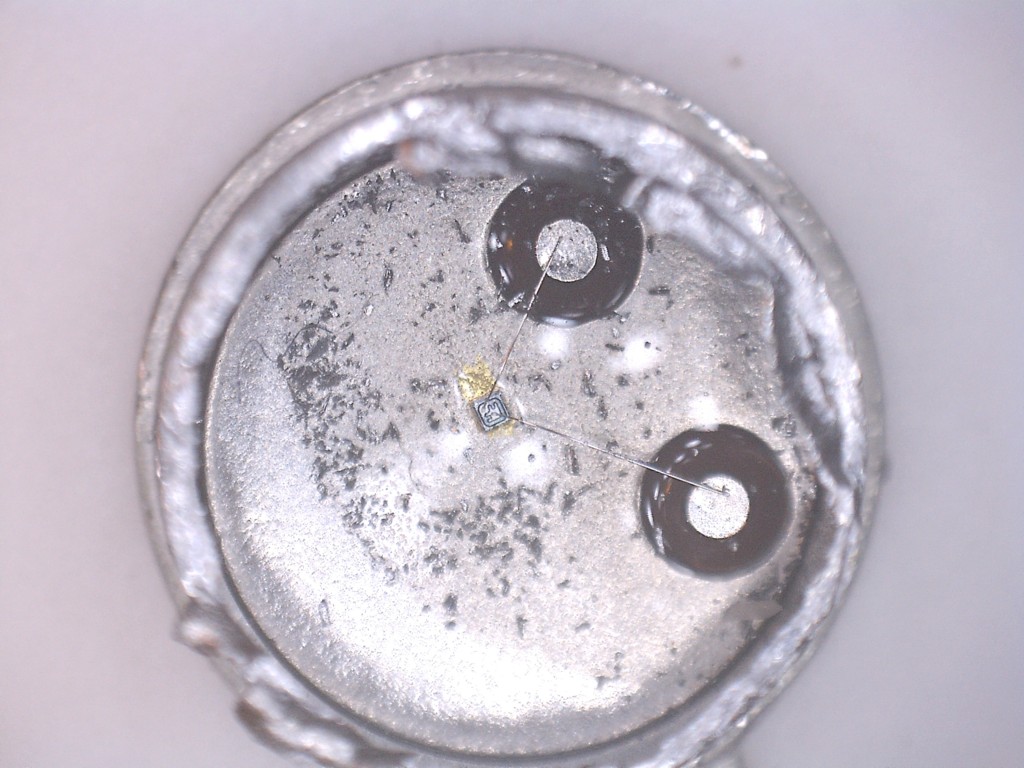
You can just make out the tiny gold wires connecting two of the legs to a tiny little square in the middle. That little square is the transistor. Tiny. (The third leg connects to the metal case which is in contact with the bottom of the transistor).
In more detail:
31st January 2016
I've built the Controller & I/O frame !

This combines the Igor and I/O frames of my initial sketch. Igor turned out to be somewhat smaller than I initially thought.
[You'll see some chips in this picture. I'm allowed them. They're not part of the processor proper but its peripherals. I did initially intend to do the peripherals with transistors only, and I might still do that. But I'm rather keen to see the processor run sooner rather than later so thought I'd allow myself a shortcut for now. The double line you might be able to see meandering across the middle of the module marks the boundary of the processor (above) and peripherals (below).]
It went together reasonably easily, there was a final sting in the tail from the great RS transistor disaster which meant I had to build a couple of extra boards. Most of the time was spent writing programs for the FPGAs and PICs.
With this seventh frame we now have enough to construct a Megaprocessor.
This means that the build phase is over !
That's right..
the soldering is done !!
the soldering is done !!
the soldering is done !!
There's still work to get to the end but the long long slog of endless soldering has ended. Still can't quite believe it.
So what remains to be done -
- Having finished the frames I need to go back over the earlier ones for some remedial work. Fitting the faster adders I've mentioned in a previous entry, I've noticed various inconsistencies in signal labeling, and a few other little things
- I also need to sort out the software/documentation side of the project. During the long march to get here things have got a bit tatty and need to be trimmed and tidied up to make sure everything is clean and consistent.
- I need to uprate my test tools, both hardware and software, to support the integration phase
- Then its integration, wire the frames together in stages testing as I go. And make it work. (How hard can that be ?) As each frame gets its final signoff there'll be a bit of cosmetic work as everything gets fixed down for good.
- Write some programs.
- And finally order the champagne and canapes and have a party
There's still scope for a few problems to emerge from somewhere but surely now the end has begun.
Here is how the 7 frames are now stacked up in my living room.
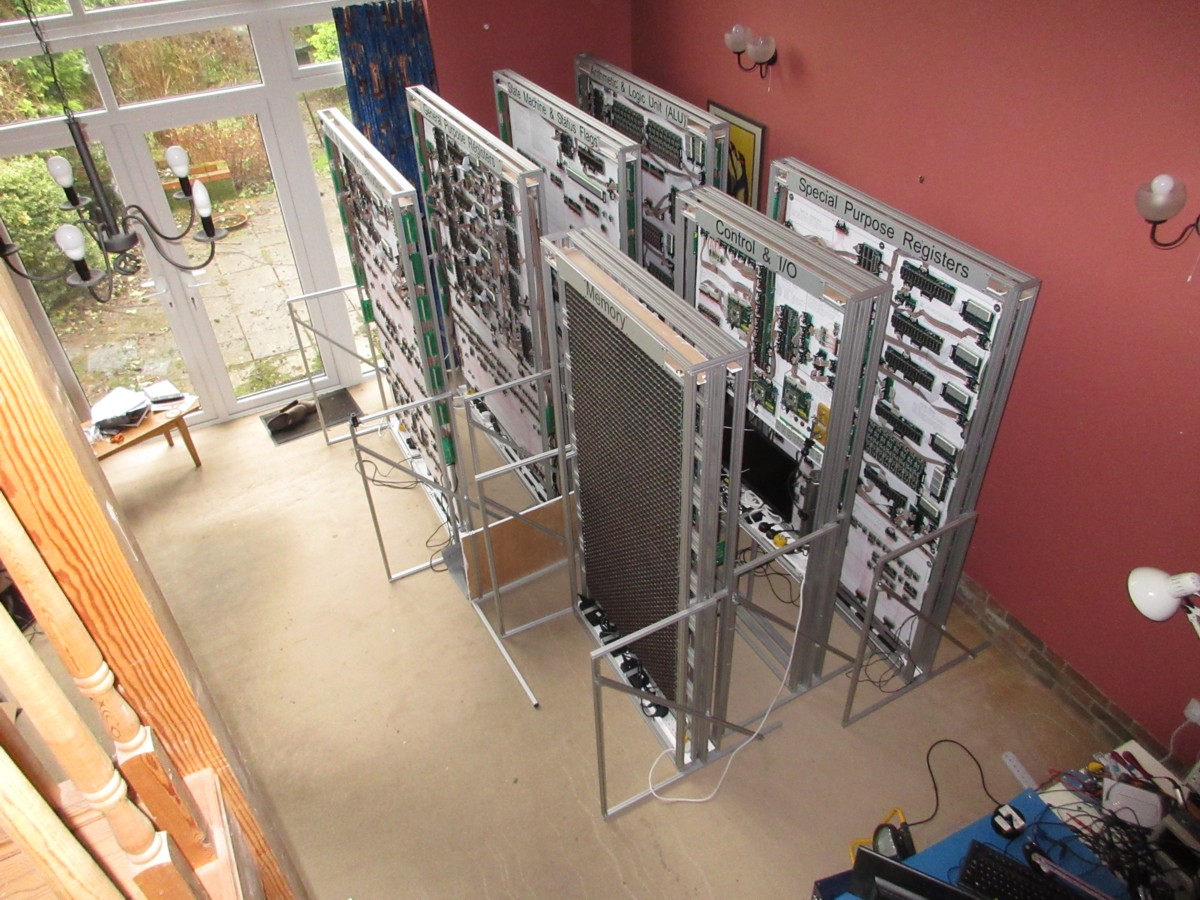
The sofa had to move out at Christmas time, but I brought back one of the armchairs so there is still a little comfort to be had. That'll have to go when integration starts.
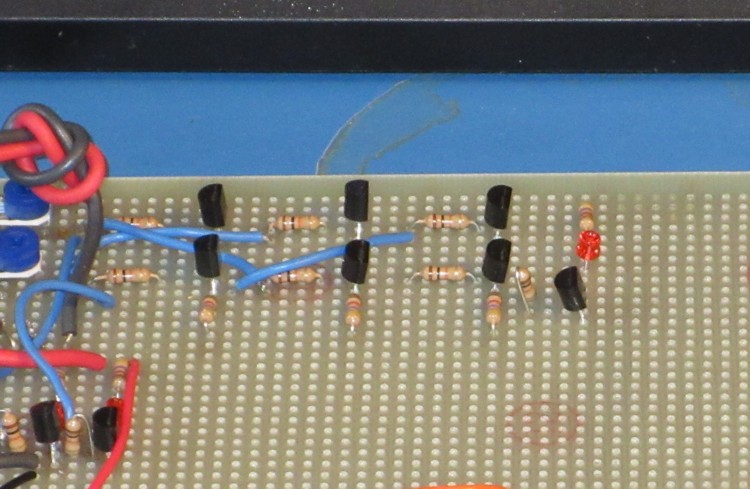
On a historical note whilst sorting things out I came across my very first prototype gate.
30th December 2015
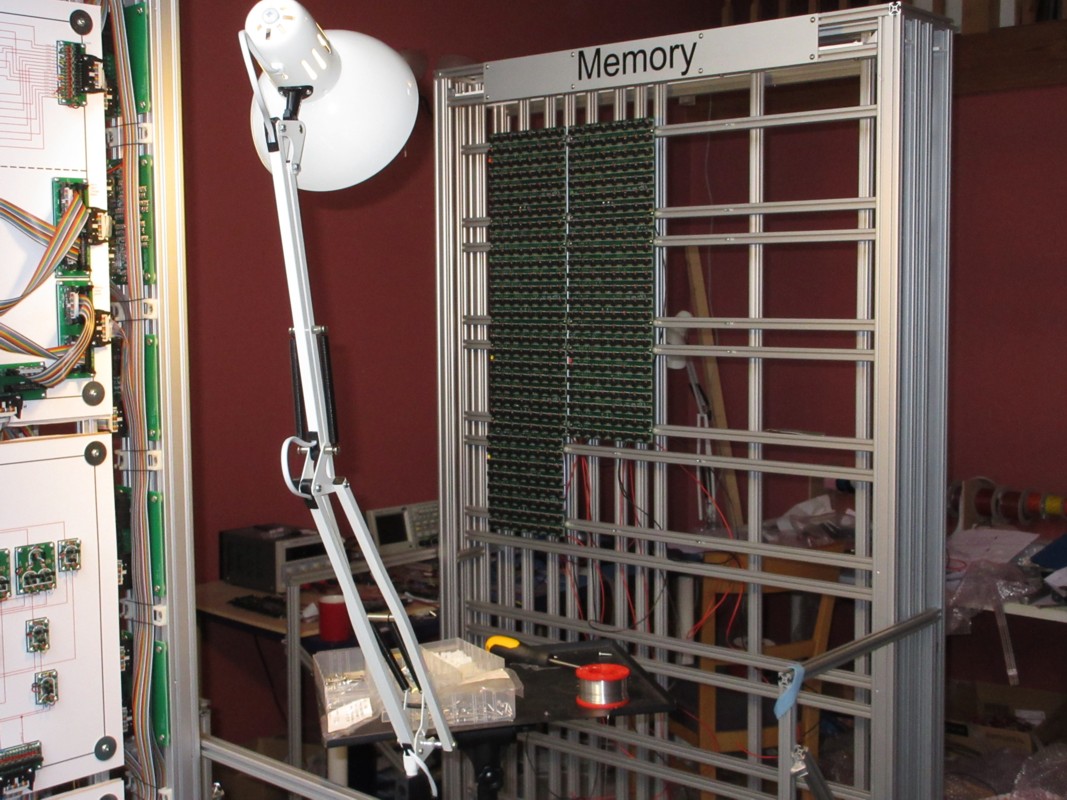
I've completed the memory frame !! Can't really believe it, it's been an epic amount of work. Here's a little video of it in action.
As well as the boards trashed with the wrong transistors I also had to build another 4 of the memory boards to replace those I couldn't get working. If a single bit cell was broken then I could generally debug and fix it. But when the failure was such as to take out a byte or a column of bits then it usually proved beyond me, or at least it was taking longer to work out what was wrong than build a new board. There are 32 memory boards on the frame (8 bytes each). Out of the first 32 I built only 11 worked first time. Just 1 in 3. So there was a lot of debugging. I'm not sure but I think the main issue was solder bridges. On a couple of occasions when I had chopped off what I thought were the problem transistors I could see something like the picture below.
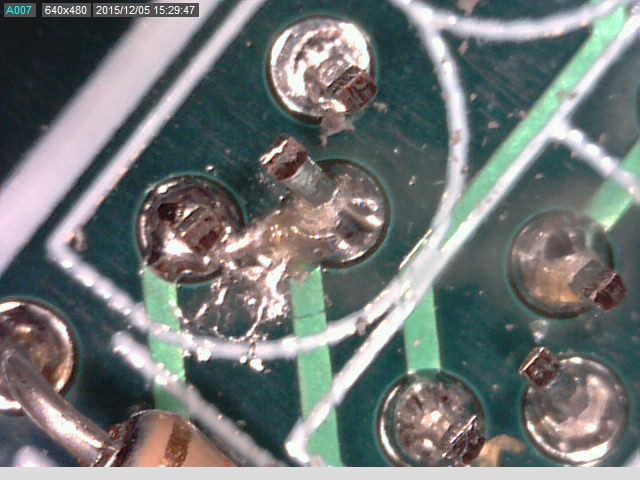
I don't think these were caused when the transistor itself was being soldered in, rather it's the mess I created when soldering the resistors. Occasionally when trying to solder a resistor I would miss the lead and hit a pad meant for a transistor and
fill it up with solder. I then used a solder sucker to clear out the blocked hole. I took care to clear up on the side I was working (the solder side) but forgot to look on the component side where it turns out the solder sucker was creating flashes of solder which went on to form the bridges. Once I worked this out I was a lot more scrupulous about clearing up both sides. For what its worth the extra set of 4 boards that I did at the end all worked first time, not a brilliant statistical example but does provide some confirmation.
The memory frame differs from the others in that it has boards on both sides. The boards on the front implement the actual RAM, here they are shown part way through the assembly.
And then there are a set of boards on the reverse which multiplex the 8B boards together to form the 256B.
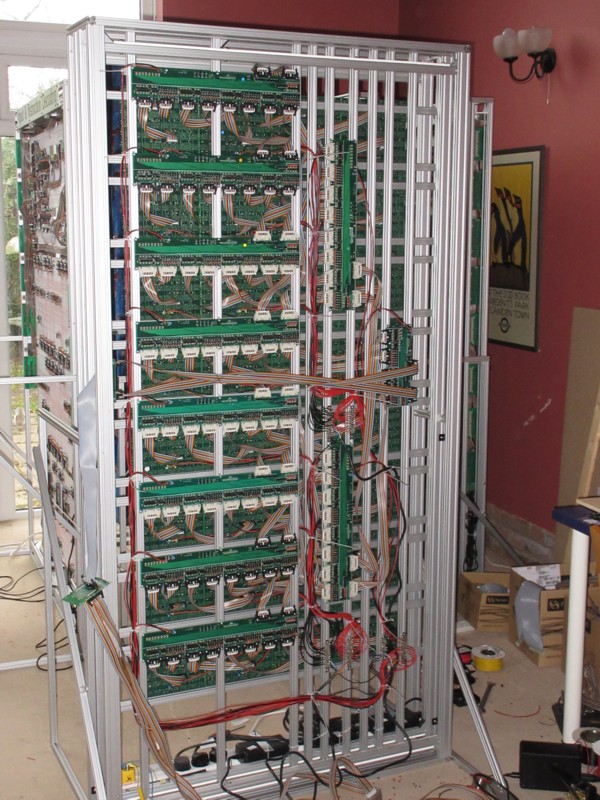
The arrangement is easier to see here:
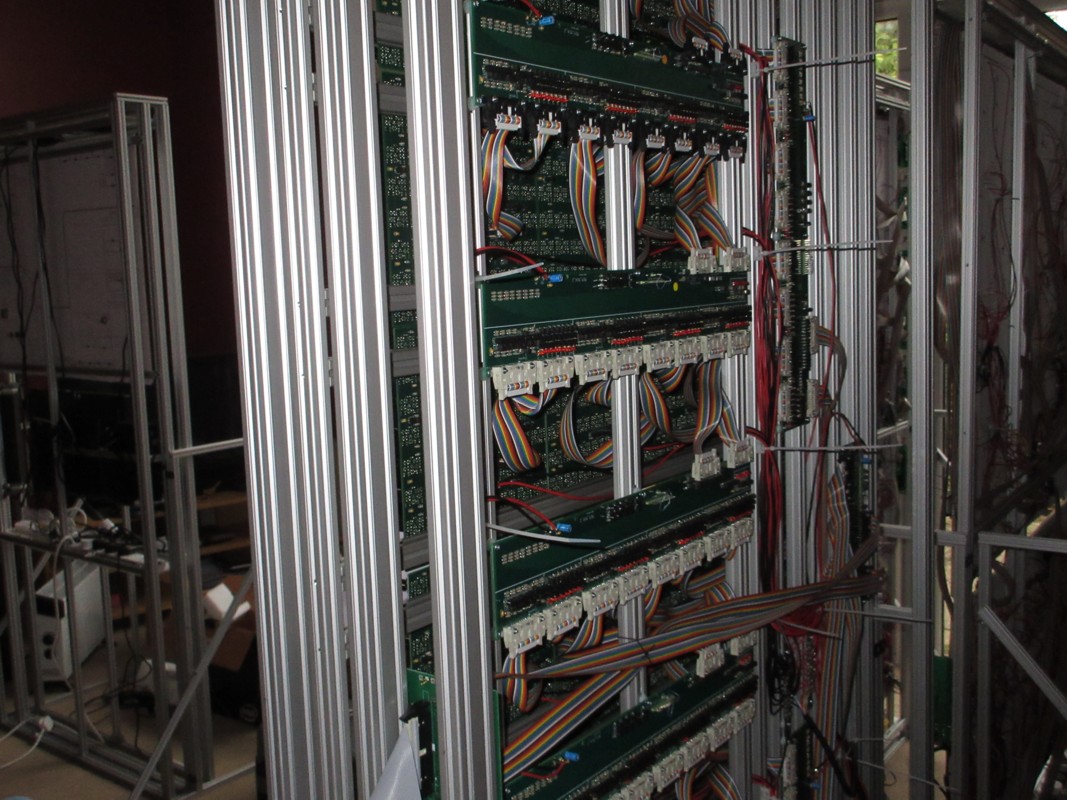
It took about 50 ribbon cables to connect it all together. And that was another source of woe. For some reason this time I made a lot of bad cables. 8 of them had problems, took a while to untangle that mess.
28th October 2015
I've had a small disaster on the soldering front. The last batch of 4000 transistors were wrong. I ordered the right ones, the packing list said they were the ones I ordered, and they looked like the ones I wanted. I didn't check further than that. But they were a completely different type. So I soldered them into the boards. 2 weeks time spent carefully and accurately crafting complete junk. That knocked the morale a bit.
But I have now finished the frame for Special Purpose Registers.
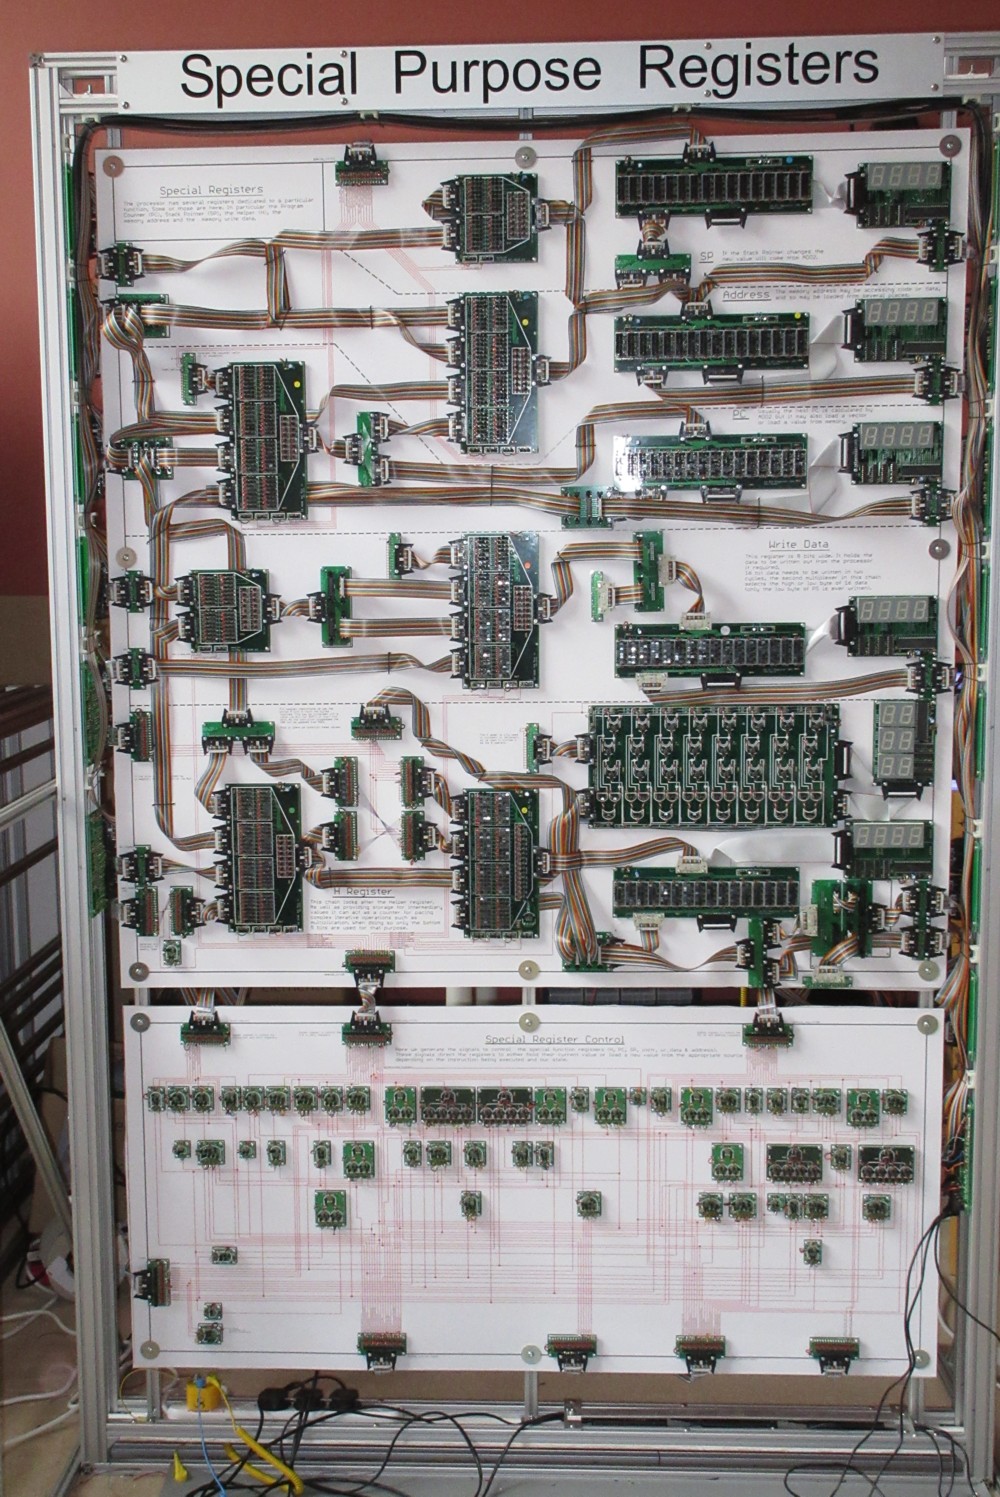
A few problems on this frame.
The main mistake was another bad ribbon connector where bits 2&3 of a bus were shorted together at one end, but at the other end bit 3 was floating. That took some hours to sort out.
The other big issue was a mismatch between my simulation and the hardware. On this frame there's a few byte rather than word values being moved around but I still use 16 bit buses. In software land the MS bits were zero but in hardware land they were floating and read as ones. So my tests all failed. It is possible that it doesn't matter. But it was easier to do the correct thing and fix the hardware to set the MS bits to zero than changing the simulation to see if I could get away with not doing so.
All of which means that I have finished the 5 frames that make up the processor itself !!!
In principle I could wire them together and have a processor, but we need something to connect them to. Memory frame next and then the control+I/O.
I've taken a bit of time out of soldering to start padding out this website and have added a page where I try and answer a few questions and add a bit of detail, see here.
29th September 2015
I've mad a lot of progress over the last month or so on several fronts.
Firstly I've finally broken the back of the soldering. Still a few weeks to go but I can now see the end. Huzzaah !
The second chunk of work has been to complete all the metalwork and carpentry for all the frames. This does mean the living room is getting rather full now.
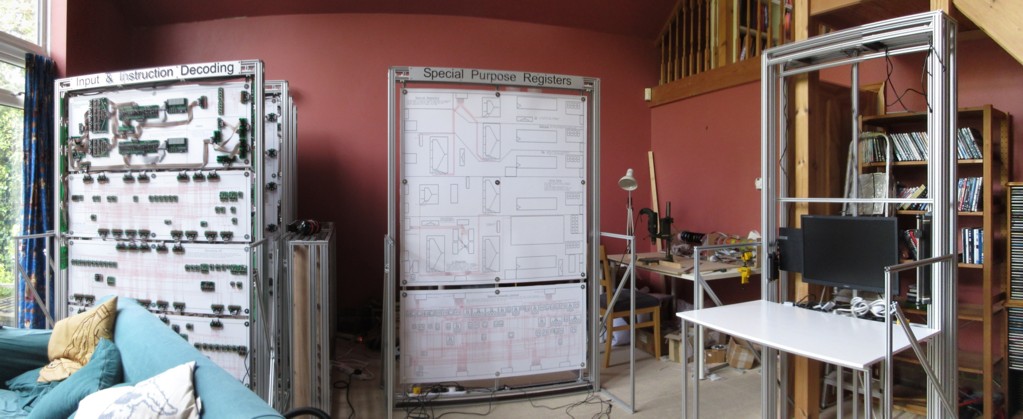
I've had to lose the armchairs, but am still clinging onto the sofa and TV. The upside is that I can now walk down the hallway without having to thread my way through stored materials. From the left you can see the four completed frames, the frame for RAM on its side, special registers ready to start assembly, and then the frame for I/O and Igor.
The third chunk of work has been to sort out what I'm doing for the non-processor frames. In my initial sketch there were four of these (RAM, ROM, I/O, Igor). For "Release 1" there will be only two. Critically this means that I can set up the beast in my living room, or at least that's what the plan claims.
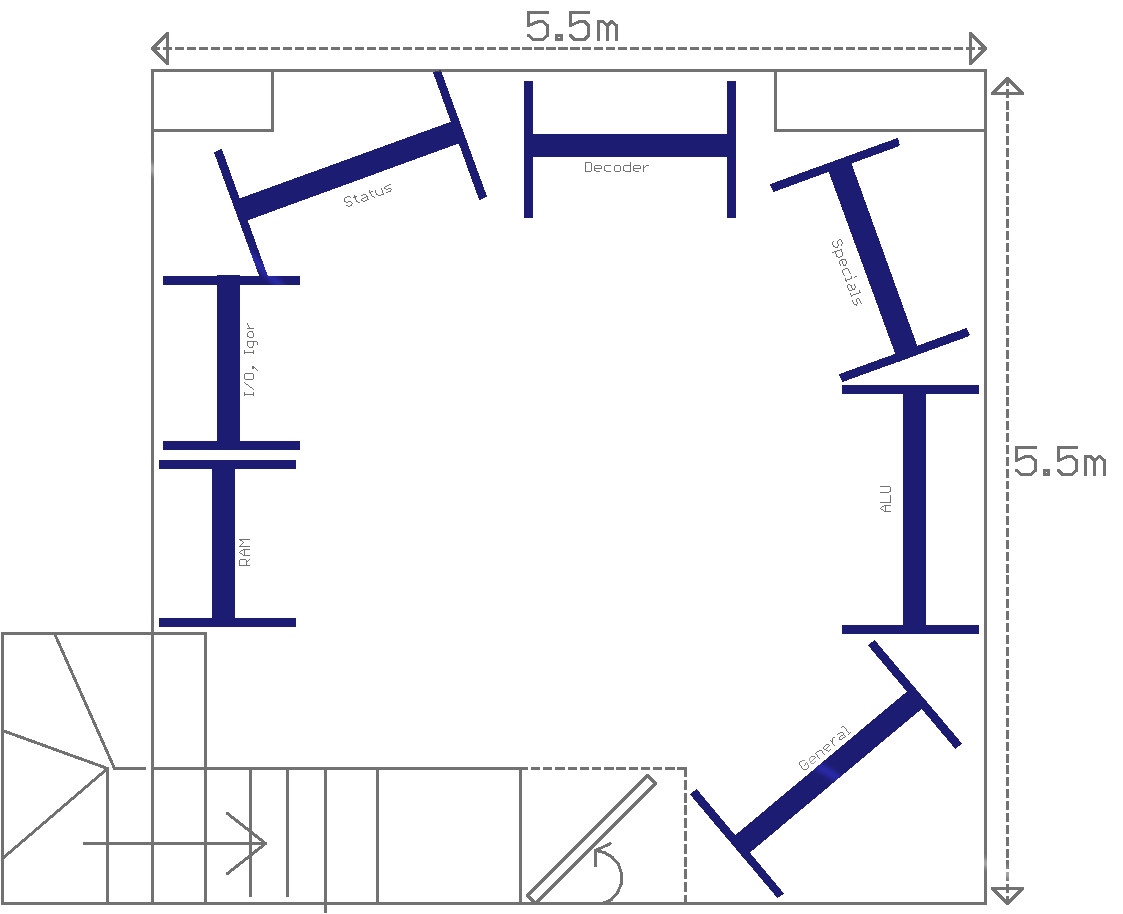
You'll notice that ROM has disappeared. One of the peripherals I'm adding is a 32k RAM chip so I can run some bigger programs. I've dual ported this and put a micro on the other side so that I can download programs/data from a host PC. And one of the features of the Megaprocessor is that you can switch the reset boot vector between 0x0000 and 0xFFF0. So to begin with it'll boot from the big RAM chip, and then if/when I do the ROM it can boot from that instead.
Igor was a place holder for the control station. I didn't quite know what I wanted at the start. Certainly an ability to control the clock speed, reset and maybe run/halt, but I wondered if I would have some status display or something, In the end I'm not doing much and what I am doing doesn't take much space so I've merged it with the I/O.
I've decided on the peripherals I'm adding on the I/O frame. These are :
- interrupt control
- a timer
- a counter
- a UART
- a 32K RAM chip
I've prototyped all the bits I didn't know how to do so I think I'm ready for the final sprint/slog to the end.
I also went back and had another look at the processor speed. I now know what's going on and I've been a twit.
When I was first wondering how quickly the Megaprocessor would run I looked at the datasheet for the transistor (2N7000) that I'm using and saw:

that it had switch times of about 10ns. Pretty fast. My 16 bit ripple adder means that data must propogate through about 32 gates for the adder alone. There's other logic to get through and you could imaging that the sheer physical size of the circuit (there's yards and yards of cabling) might slug the signals by quite a bit but I thought a fantasy of a MHz not impossible and certainly 100kHz should be achievable. And that would be entirely satisfactory. So I was happy. I did have a little look at the first working gates and it all seemed ok. But I didn't look closely enough. I also had not looked at the data sheet properly. There's more numbers there.

You get the 10ns speed when you have a "low"load resistor, and the transistor is carrying half an amp. With 14,000 transistors that would mean I'd need a 7000A power supply. Which is tricky.
I'm using 10kΩ pull up resistors so my speed's a lot lower. As it happened I had not built all my adders, so I built the last one using 1kΩ pull up resistors. And guess what, it's about ten times faster. (Note these were 8 bit adders).
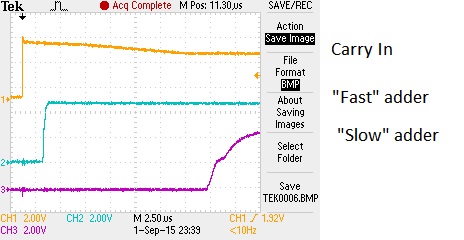
I also did some simulations (using LTSpice) of the transistor circuits and those results agreed. Yes I should probably have done those simulations at the start, but the circuits were easy and seemed to work so I didn't bother. As I said, I'm a twit.
There is no way I can change the pullups on the boards I've built, it would take forever and I'd probably do horrendous damage. And the boards are now nearly all built (! yes that's right) and I'm not starting over. But we do have a way we can can claw back some performance. It is the (slow) adders that dominate the speed of the processor. If I replace them with "fast" adders then their time will become "negligible" and instead the speed will be determined by the "slow" logic. There's "only" four adders to build. They're big boards but it won't be too painful so I'm going to do that. How fast will the processor be then ? Good question. It depends on what the longest logic chain is which I have to confess isn't particularly obvious at the moment. My current guess is that its about 12-15 gates so I'm now hoping the processor will be able to run > 50kHz.
18th August 2015
Just finished the Decoder frame.
So we're now at 4 frames. My original sketch shows us needing 9 frames but I think we can now get away with 7. The I/O and Igor frames are merging, and to kick off we don't need the ROM as we'll be able to download programs into the RAM. So the build is over half complete !
Still no more transistor death so the ban on Henry seems to be working. In fact not many problems this time though had a couple of exciting new failure modes, both involving short circuits.
The first was with a ribbon cable. Took me a while to track down as for the first few hours I assumed it was either my soldering or the return of transistor death. Once I had narrowed down the problem to the cable I had to dismantle the connector and look at it under a microscope to find out what had happened.
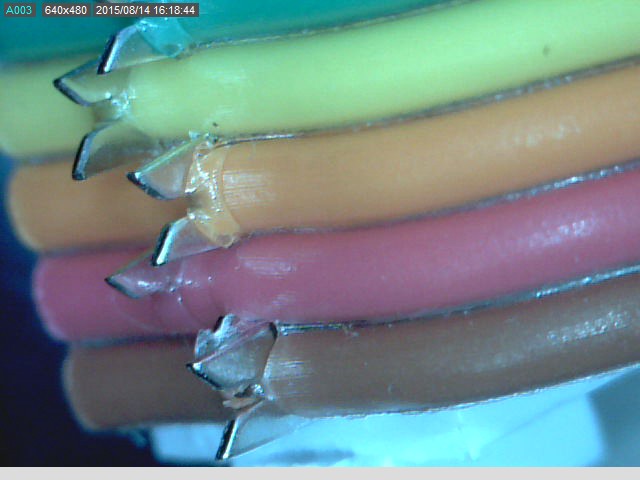
It looked to me like there was some extra metal on the tooth piercing the brown conductor and it was also slicing the red to give the short circuit. But then I noticed there was only a single tooth going through the red, where was the other one ? Removing the ribbon cable revealed what had happened.
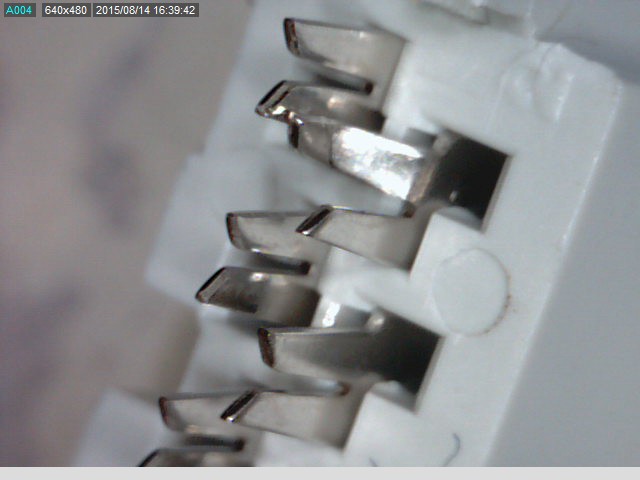
I must have bent the tooth destined for the red conductor whilst making up the cable and it had distorted enough to hit the brown.
The second failure was with this board....
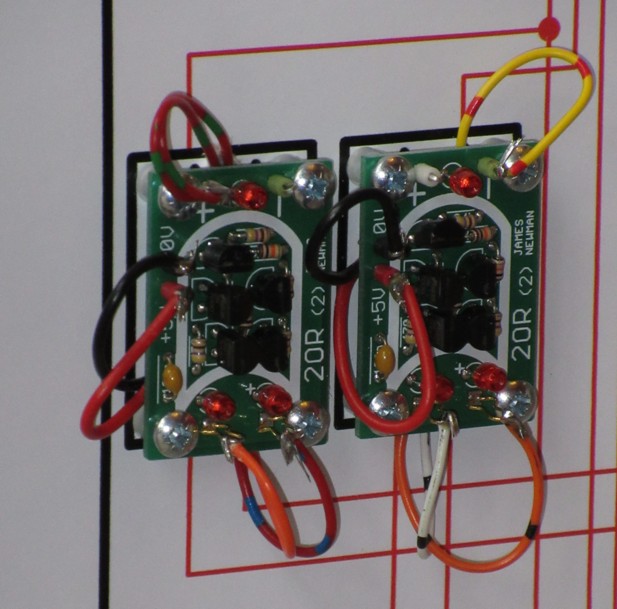
It presented as if the left most input signal (orange wire) was always seen as 0 so I initially blamed the source which led me astray for a while. After staring at the board I couldn't see anything wrong so I tried poking it and it flickered briefly into obedience. It turns out that the terminal is shorting on the mounting screw. That shouldn't matter as the boards are mounted on plywood. But in this particular case the board is mounted over one of the aluminum bars of the frame, the screw is just long enough to pierce through the plywood and short to the frame.
One of the most important components of the project is of course the LEDs and in particular their flashing. Here is a little video showing them in action.
flashing_lights_video
The next week or two will be a consolidation phase I think. I have a bunch of loose ends to tidy up. Various bits of software have fallen behind and need to be brought up to date and I need to nail down the I/O+Igor frame. And of course some more soldering. Always more soldering.
6th July 2015
Some people also asked if I could an RSS feed so I've done that. It's relatively easy once you know the answer.
1st July 2015
The big excitement during the last week or so was the articles appearing in The Register and on the BBC News web site. I still don't know what the trigger was but I really enjoyed my five minutes of fame. I've had loads of encouraging emails which has been a big morale boost. However I was badly caught on the hop so this website was nowhere near ready.
Quite a few people asked for a way to get updates so I'm creating a Facebook page where I'll post something whenever the website is changed. I'll also start trying to fill out the pages with the information (and schematics) I was planning to add and also answer the various questions I've been asked. This will likely be a slow process as I'll be spending most of my time on the build.
It was Henry !!
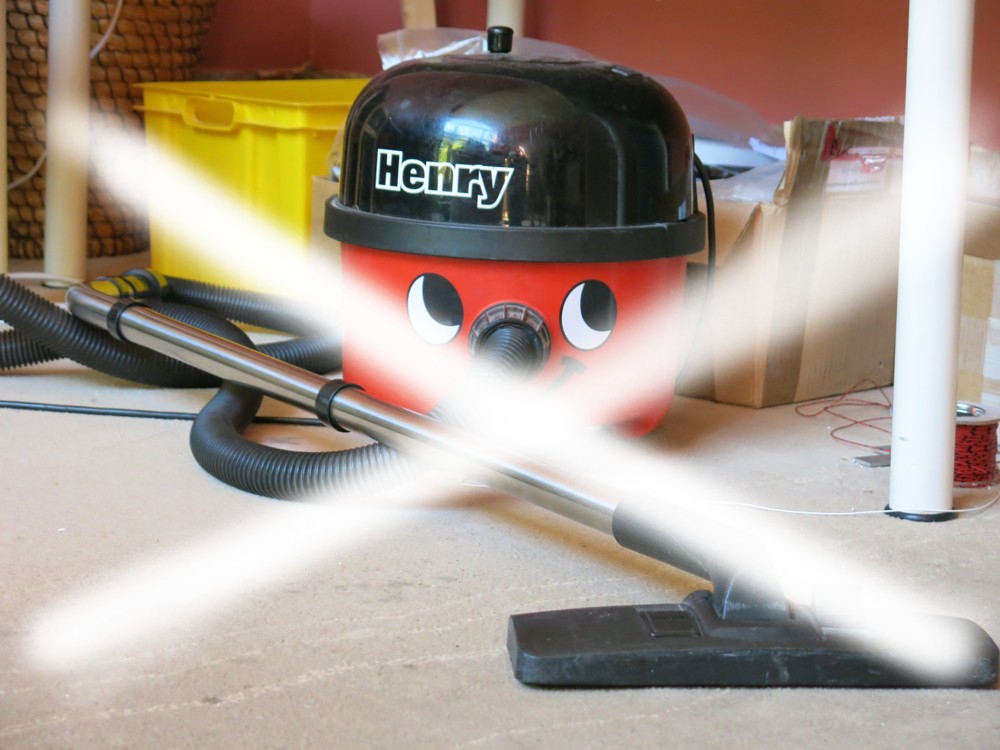
The obvious candidate was static discharge, but improving my work practices in that respect made no difference.
The other candidate was surges/glitches on the power supply but turning that on and off a few hundred times did not lead to further transistor death.
However, eventually, I noticed that I sometimes got little shocks off Henry when doing the housework. Then I realised that as I was also in the habit of hoovering the Megaprocessor it might be Henry that was doing the damage. So I didn't use Henry when building the General Purpose Registers frame, and there was no transistor death. So life for Henry is now just carpets, no electronics.
You might be wondering why I hoover electronics. If you look at a picture of one of the completed frames you might be able to see that some of the ribbon cables are tied in place to stop them flopping about. I have to drill the holes for the string after I've mounted the electronics. This covers everything in dust, so I was hoovering to clean up the sawdust.
I have just finished the metal-bashing and carpentry for the Decoder frame, shown below. You can see the three built frames squashed over to the left.
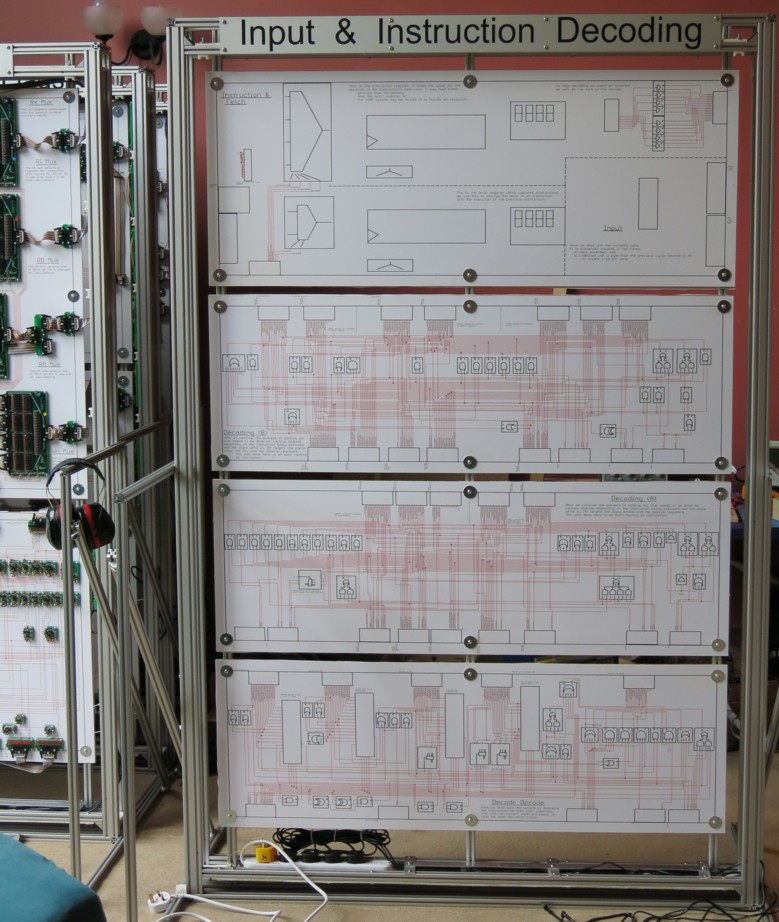
"All" I need to do now is populate and wire it up. I've got the boards ready to go:
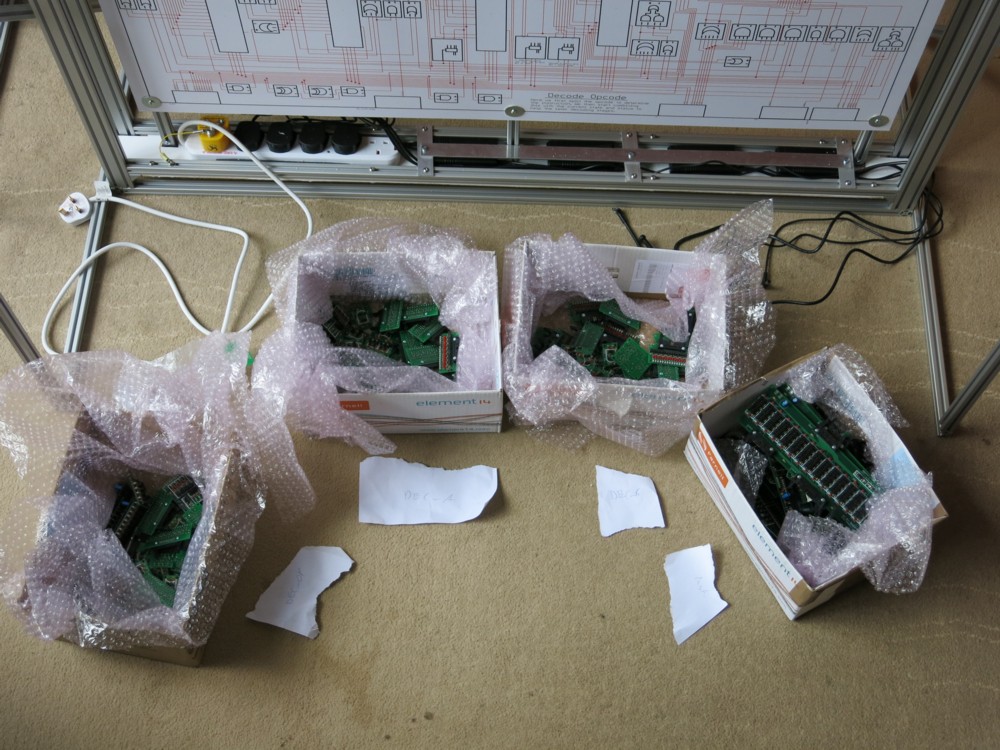
As well as building up the decoder during the next few weeks I also need to start looking ahead to the non-processor frames: I/O, memory and Igor.
21st June 2015
Completed the frame for General Purpose Registers.
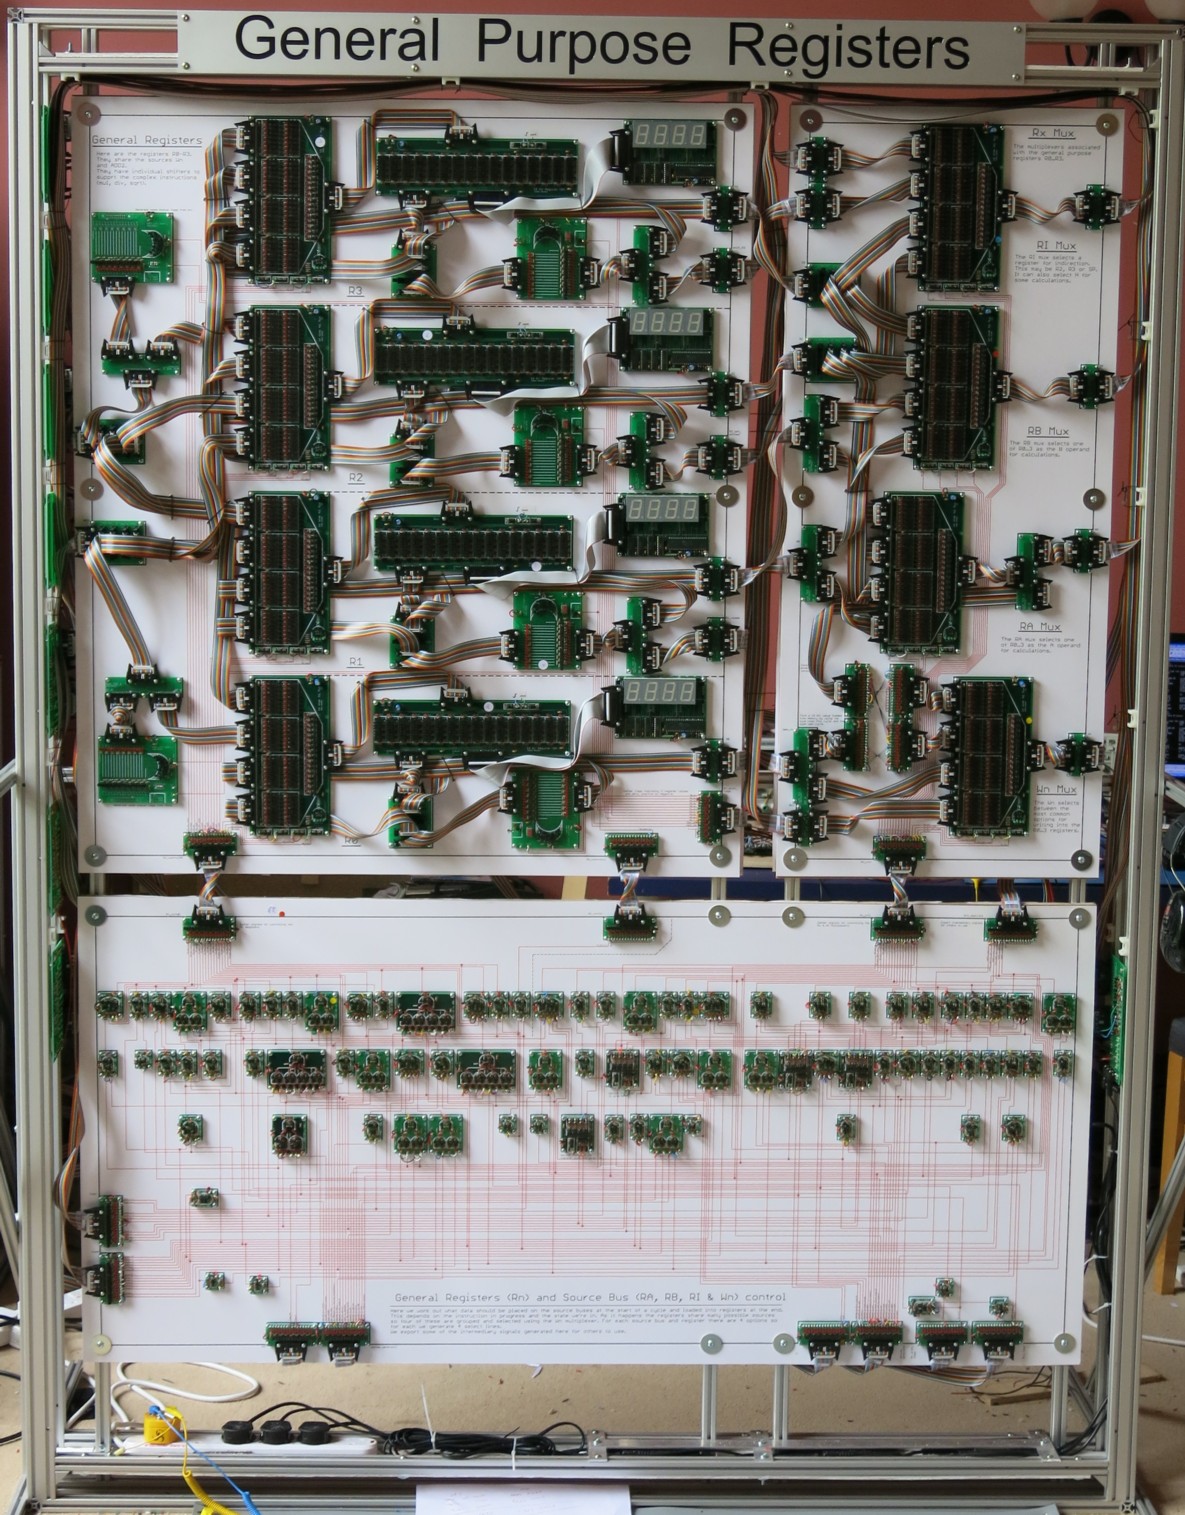
So that's three frames so far now ! Half way to something that might work. Decoder frame next.
I've also been building up some memory and now have the grand total of 32 Bytes. And they work. Here is a picture of them being tested. Each of the big squares has 8 Bytes and the thin board in the middle combines them into a block.
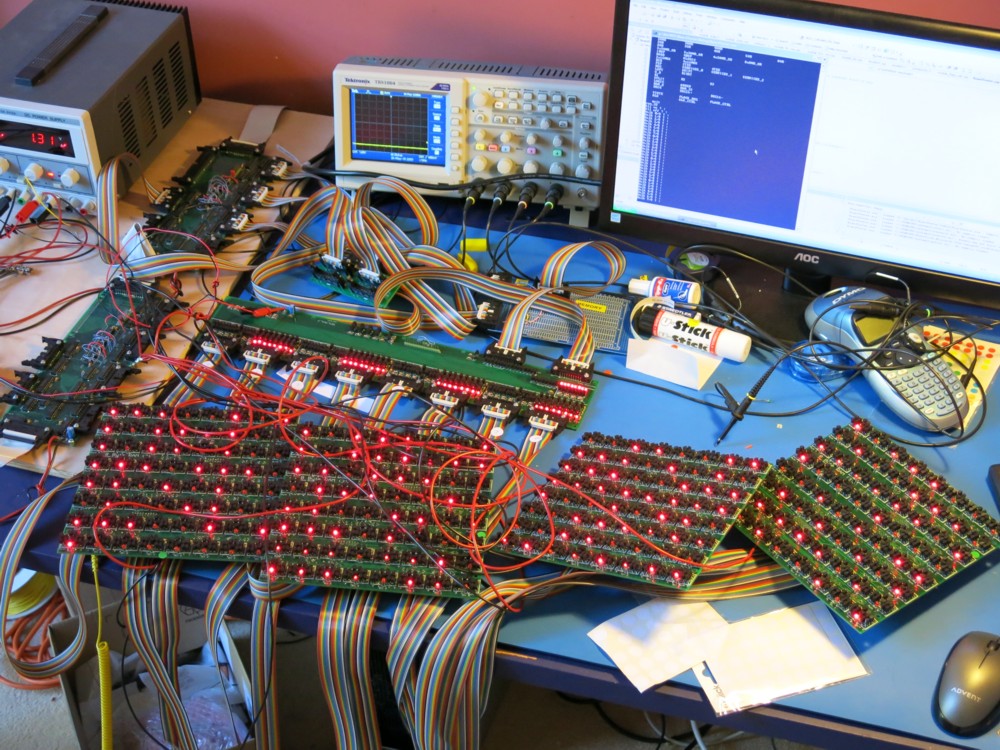
20th May 2015
Completed the ALU !.
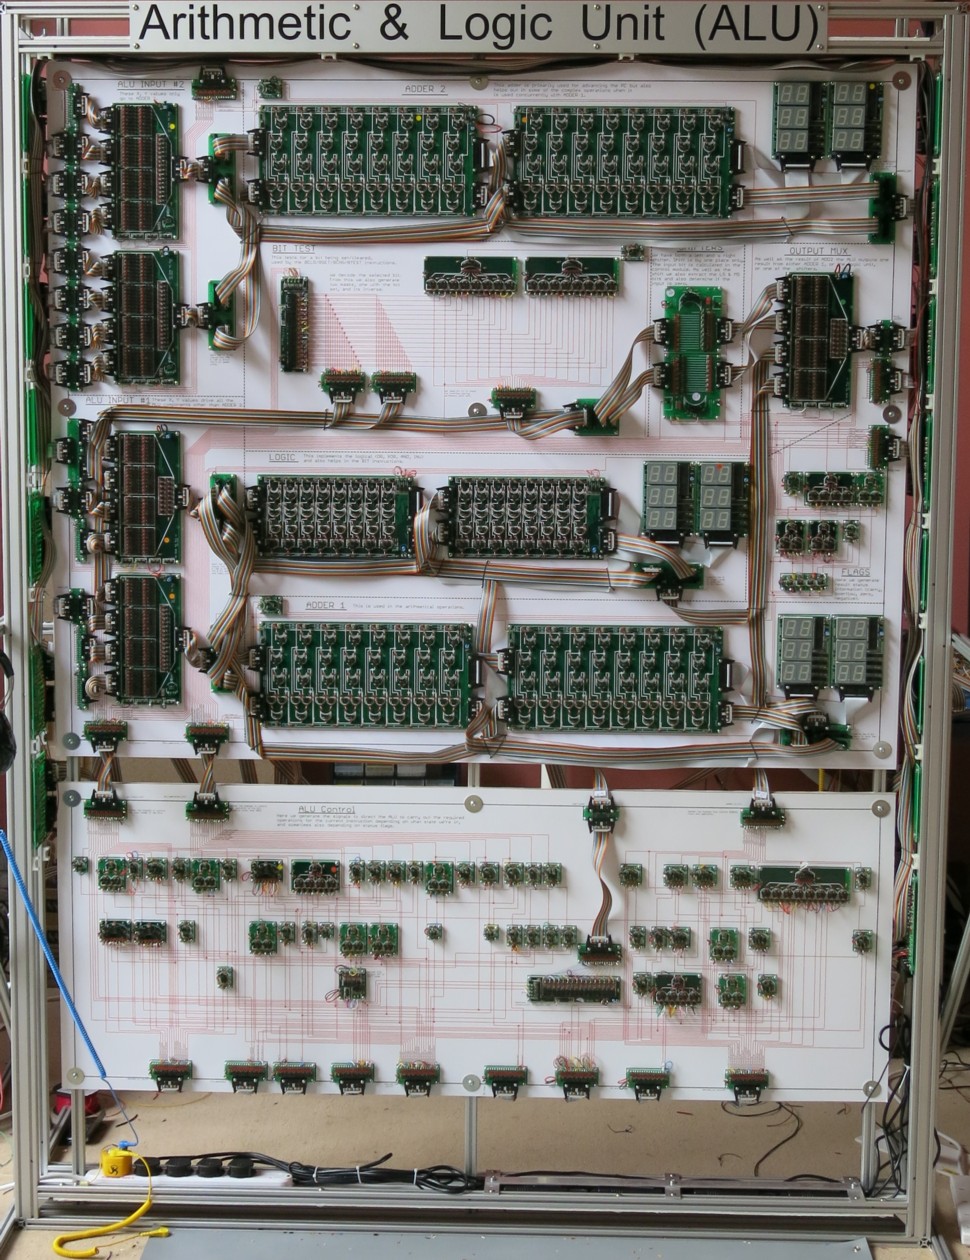
Had a few problems in the last couple of months.
Biggest was I found that my multiplexers didn't quite work as wanted. In particular when no input was selected they were supposed to output all zeroes. Unfortunately they output all ones. I thought of all sorts of horrible ways of trying to get round it but in the end had to respin the board. Which means I now have to solder a dozen of the new boards. I needed three of the new ones for the ALU (above), I could use one of the old ones.
The other big issue was trying to sort out inter-frame connections and try to add some static protection.
Oh, and my simulation model for the adder didn't quite match the hardware (carry out generation) so I had to tweak the logic of the ALU a little. As I'd already started constructing it I then had to dismantle the frame, redesign the artwork and put it back together again. That was a depressing moment.
Still suffering transistor death, about half a dozen during this stage. Just to cheer myself up I also botched making up one of the cables.
With the ALU built I'm able to make a first estimate of the possible speed of the mega-processor. I think the adders will be the slowest element as I've done a very simple ripple adder. They're 16 bits wide so a change at the least significant bit needs to work its way through about 32 logic gates to affect the carry out at the end. So I set it up to add 0xFFFF + 0x0000 + carry_in and looked at the time it took for a change in the carry_in to propagate through.
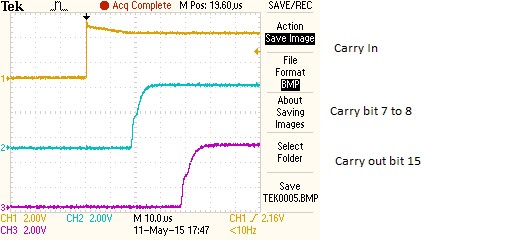
The other deduction we can make is that the propagation time through a single logic gate is about 1μs.
20th Feb 2015
Completed the controller module for the status register.
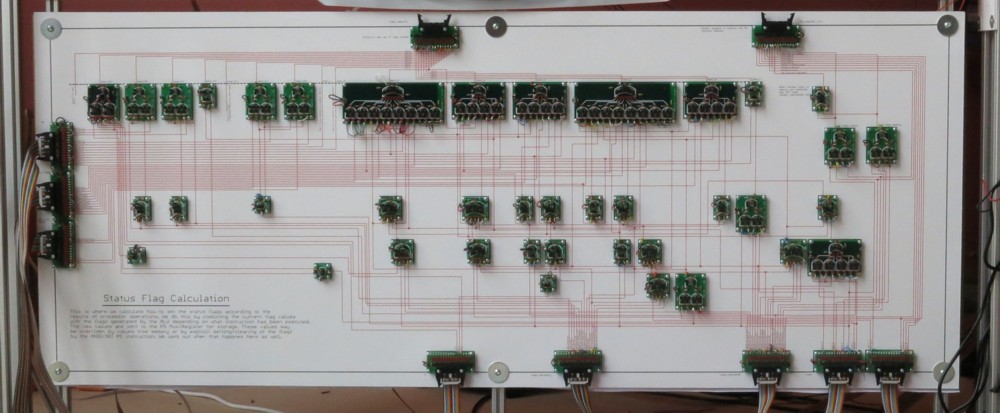
A couple of wiring errors. Just the one transistor death this time. There was also an error on the schematic so I'm breaking out the tipex and my felt tip pens to fix it.
Which means we now have our first frame !!
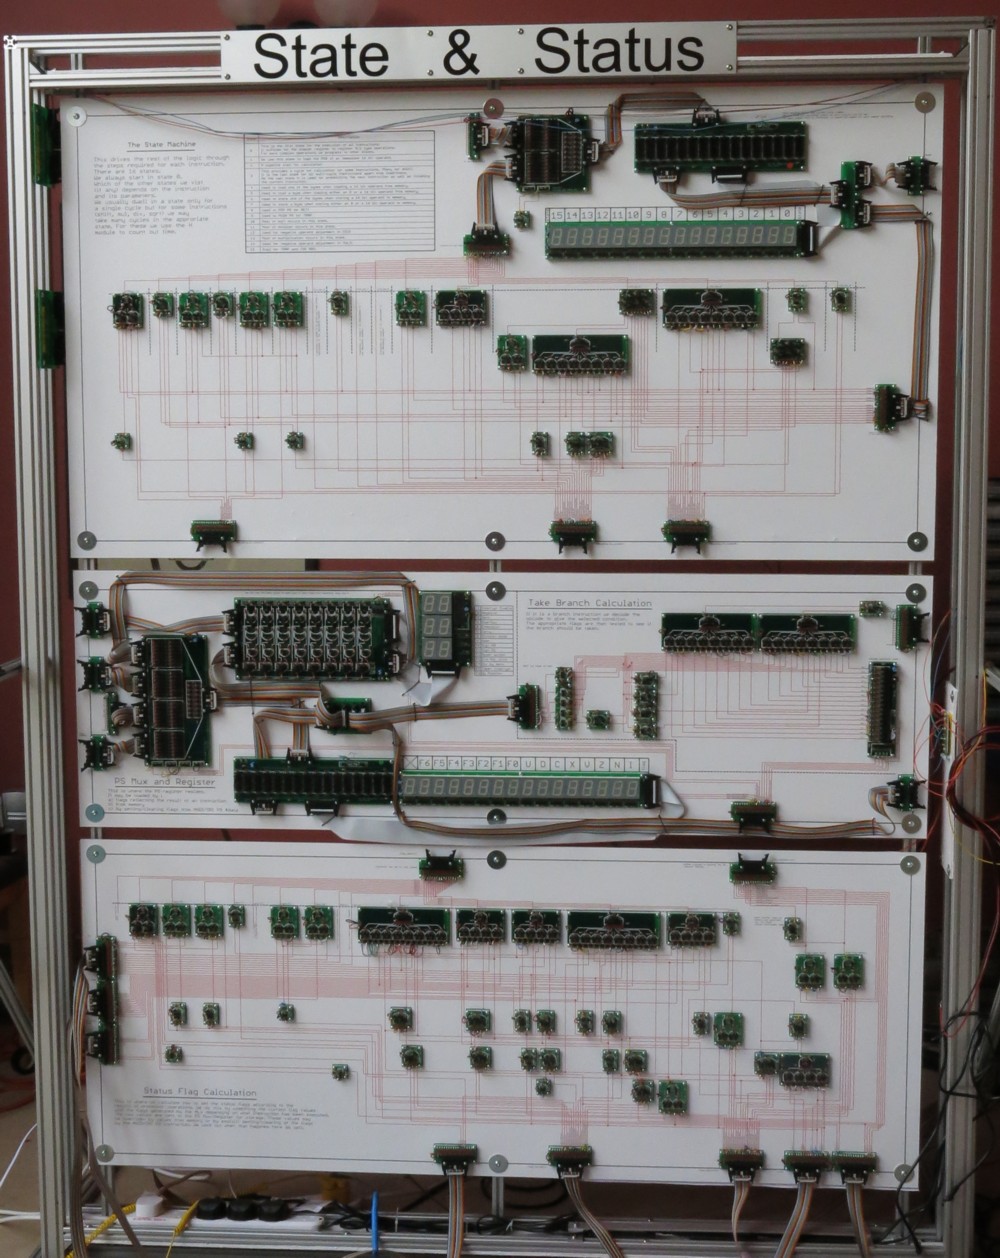
There's a few bits left to do on it mostly relating to the connectivity with its neighbours. But its a big step forwards. I'll now start work on the ALU frame. This could be where the conflict in scale between the Megaprocessor and my living room starts to escalate.
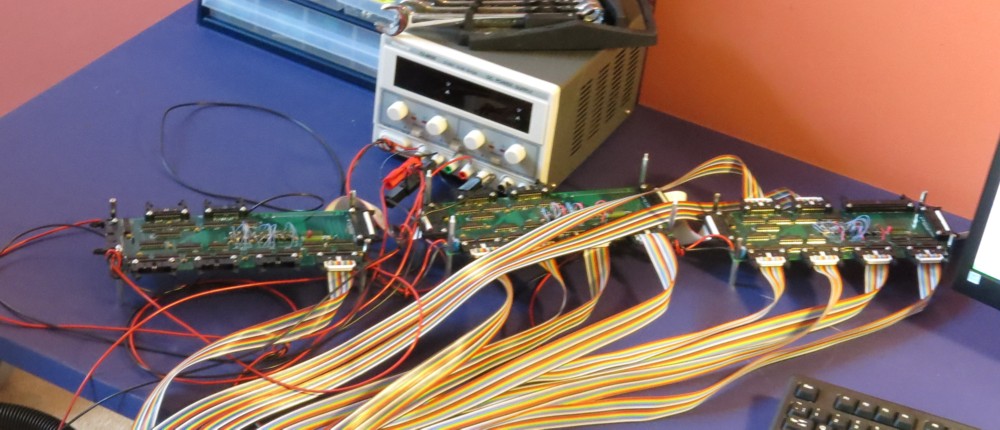
The other bit of good news is that my test interface boards daisy-chain quite nicely. I had 3 in a row to test the status/status controller module.
30th Jan 2015
Just completed the status register module.
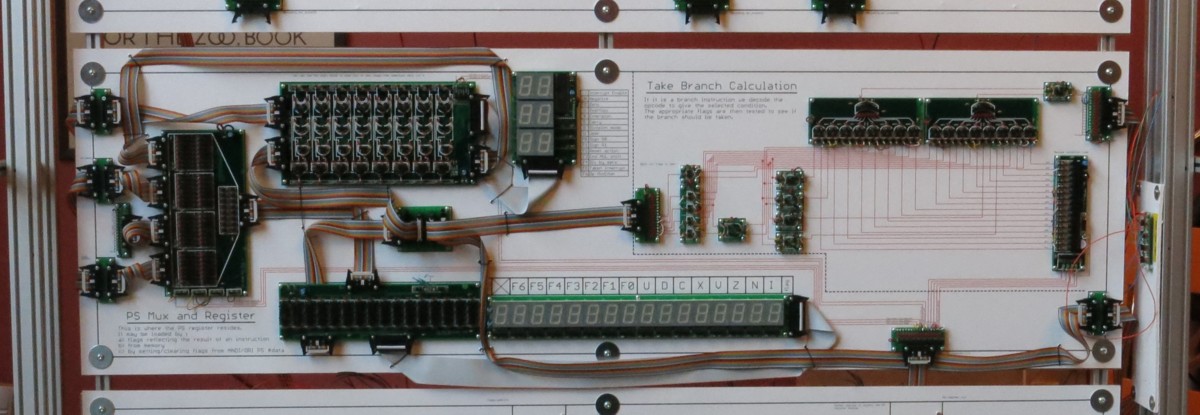
Bugs in the software. Bugs in the hardware. All a lot harder than it should have been. Anyway now to build up the controller for the state and status registers and then I'll have completed the first frame !!!
12th Jan 2015
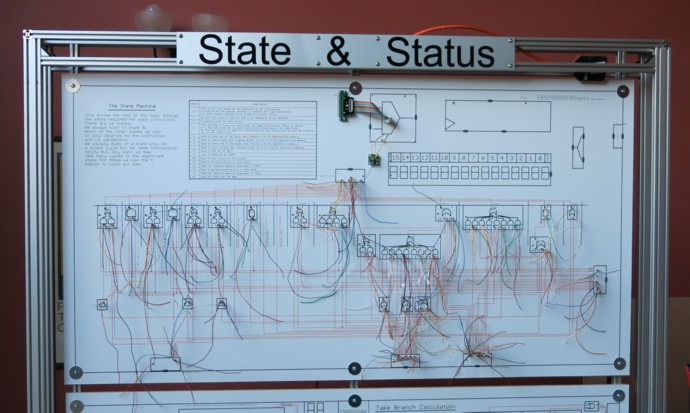
I've built the first module !! And it works !!!The state machine.Here are some more pictures of its construction. I start by putting in the wiring:
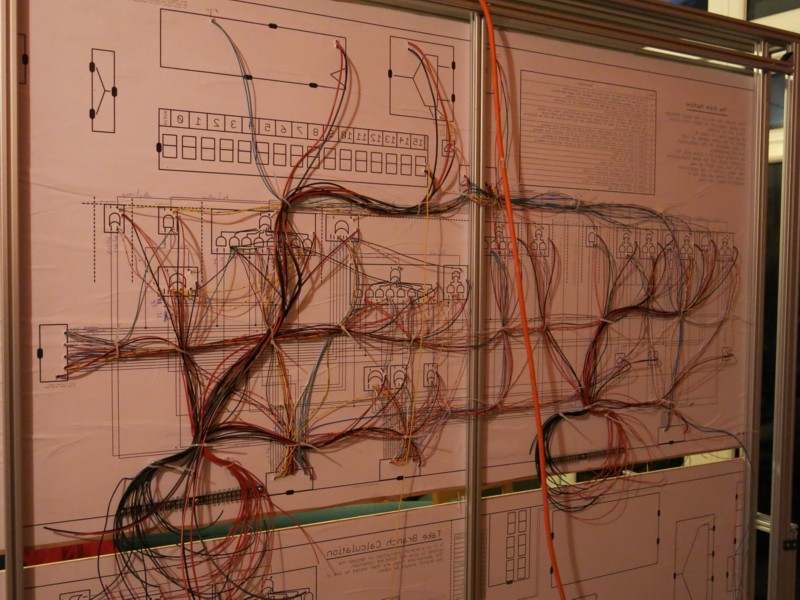
To help me do this I have a suitably reversed picture on the back of the module, so it looks like this:
After I've done the wiring I then screw the boards on top:
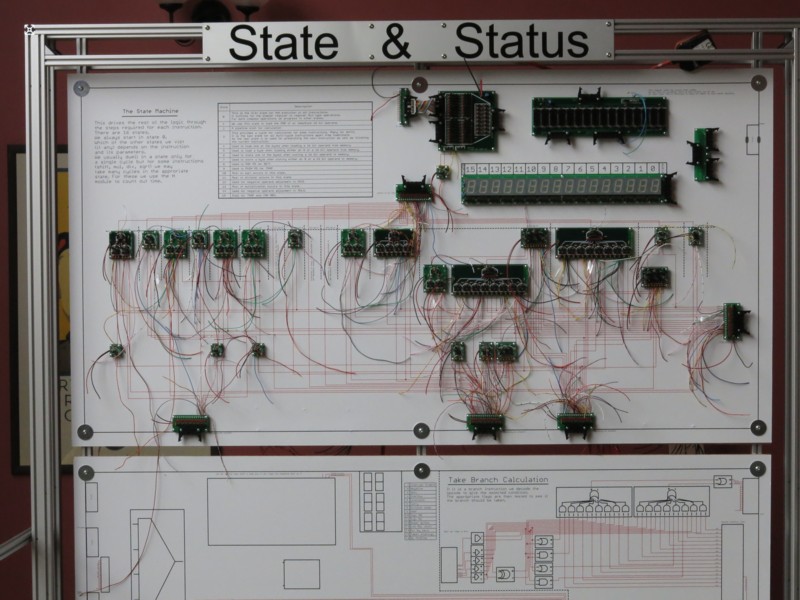
And then "all" I have to do is connect it up. Took about 3 days.
The kick in the teeth was that at some point during the assembly a handful of transistors died and that took a bit of debugging. I need to know what happened before progressing with the rest of the build. Still, it's started.
16th Dec 2014
Tantalisingly close to being able to actually being able to start putting things together. But still can't quite start. I was about to start building the first proper frame to mount the modules in. Made myself a little jig to help me drill hoes accurately. Very proud of it.
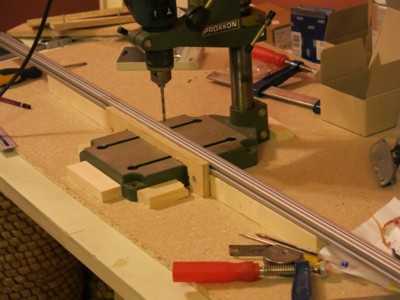
But it turns out I messed up my order for the aluminium. Whilst I realised I needed two sets of horizontal elements because there is a top and bottom, I overlooked the fact that I needed two sets of vertical elements because there is a left and a right. Bother ! And delivery is 6-10 days and we have Christmas coming up.
10th Dec 2014
The last couple of weeks have been reviewing and checking the mapping between the design and the modules. Not desperately exciting but necessary. Now I can begin the assembly, once I've cleared a big enough work space ! The dream is to have the state machine up and running by Christmas, this might be a bit of a stretch.
27th Nov 2014
I now have a first cut on all of the module layouts. Discovered a bug or two in the process which is quite scary. Next stage will be a review of a quite anal nature, I really don't want it to not work once built. I'm quite happy with about the way half of them look. But there's a couple of the control ones which don't really tell much of a story. Trouble is the only way I can think of to make them more explicable is to give them more space and I'm at the end stop with regards to size. So we'll run with what we've got.
Finished building up the RAM board. Couple of build errors (there is over a thousand components !), the transistor fitted backwards was particularly hard to find and fix. The good news is that is definitely a memory. Pushed a megabyte of random read/writes through it without error. The bad news is that it is also an inverter. Everything comes out upside down. Most vexing. I know what happened. The thing went through a couple of re-designs and in one of them it lost an inverting buffer on the input, which I forgot to compensate for at the output.
So next week or so is more reviewing and tweaking. Then we might be able to begin assembly !12th Nov 2014
Starting to make progress on the module layouts. There's a dozen to do and I have a first cut for 3 of them, I'll not polish them till I've done a first pass on all.
Built up the RAM board, very nearly. Ran out of bits so got to put another order into Farnell for a few more thousand transistors, LEDs and resistors.
Yesterday ordered aluminium for the Mark 2 frame. Also for some more PCBs; the full number (12) of the register boards I need now that it's passed it test; a board for connecting between frames which is simply a bunch of connectors; and also a couple of simple connectivity things to make the modules a bit tidier and also (thankfully) a bit smaller. This will all arrive in about a fortnight.
As always way, not doing enough soldering. But its probably right to push on with the modules as I have enough boards to start assembling the modules for the first frame (State & Status) which will be a major milestone.
2nd Nov 2014
Tested the new register and it seems to work fine. Had it set up as a shift register and was able to walk a 1 bit through it a few thousand times with nothing going wrong. The main change from the first version was to have the master and slave stages run on separate clocks so I can control the setup and hold times between them.
PCB for RAM has arrived and is waiting for soldering.
Simulator's got far enough to rate a version number. V0.001 or something like that.
Psyching myself up to ordering the aluminium for a Mark 2 frame. I'll try doing at least the access holes myself, and possibly some of the tapping as well. Half the cost of the first set of aluminium was in having them drill/tap the holes for me.
Not done anything like enough soldering. And no real progress on nailing down the module layouts. Simulator/assembler seems to have soaked up most of the time.
24th Oct 2014
My Birthday ! Treated myself to finding a way of implementing a weight instruction and managed to massage one into the shift operation.
The aluminium's arrived and I've built up a frame. 2m looks a lot bigger than I expected. My initial idea for legs/stabalisers was bonkers but I think I now have a solution. It's a lot easier to think how its all going to fit together when you have something physical. It needs a few tweaks but it's roughly right.
Done a bit more soldering. Still too scared to test the new register.
Made quite a bit of progress on the simulator. I've forgotten so much about how the MFC works, its been years since I last did any serious windows programming.
12th Oct 2014 - State of the Union
Starting to construct this website ! So it seems like a good time to take stock of where I am. And the answer is that there's a shed load of stuff yet to do.
Electronics:
- all the PCBs for the logic elements (AND, OR etc) are designed and manufactured. I've built up a fair bit. Certainly more than half.
- the PCBs for storage elements...not so advanced. I have a second attempt for the register back ready to build up and test. PCB for RAM is out for manufacture, PROM is still being designed (I'll wait to see if the RAM works before doing more on that).
- the electronics for the I/O and peripherals ...only just started, but I think I know how I'm going to do them
- I've discovered I need a few more simple boards for handling module inter-connectivity.
Software:
- I have a gate level model of the hardware, which is what I use to work out what logic boards I need and how to wire them together.
- I have an abstract model of the processor. I run this on test data back to back against the gate level model to check that it still works as I experiment with the architecture. This abstract model will go into the simulator.
- a disassembler. I use this in my back to back model testing. This will go into the simulator.
- I've started to consider the design of the simulator.
- I've most of an assembler.
- I've yet to start on any programs for the processor itself
Mechanics/Artwork:
- I have (finally; this has taken weeks) managed to map the architecture onto a set of modules which:
- might be understandable
- avoid an utterly insane amount of interconnection. Though it's still fairly bonkers.
- fit together tolerably well to make up the frame structure
- I've barely started designing the panels that will form the backdrop for each module showing its wiring. These'll take ages.
- I've a first design for the frames that will hold the modules together. Order for the material for first frame is out !
© 2014-2016 James Newman.
